# AWS Proton
*The tool Infra teams are dreaming about every two nights*
AWS recently announced a new service: AWS Proton.
As I love to have a look at the new features provided by the AWS re:Invent, I wrote this article summarizing my findings.
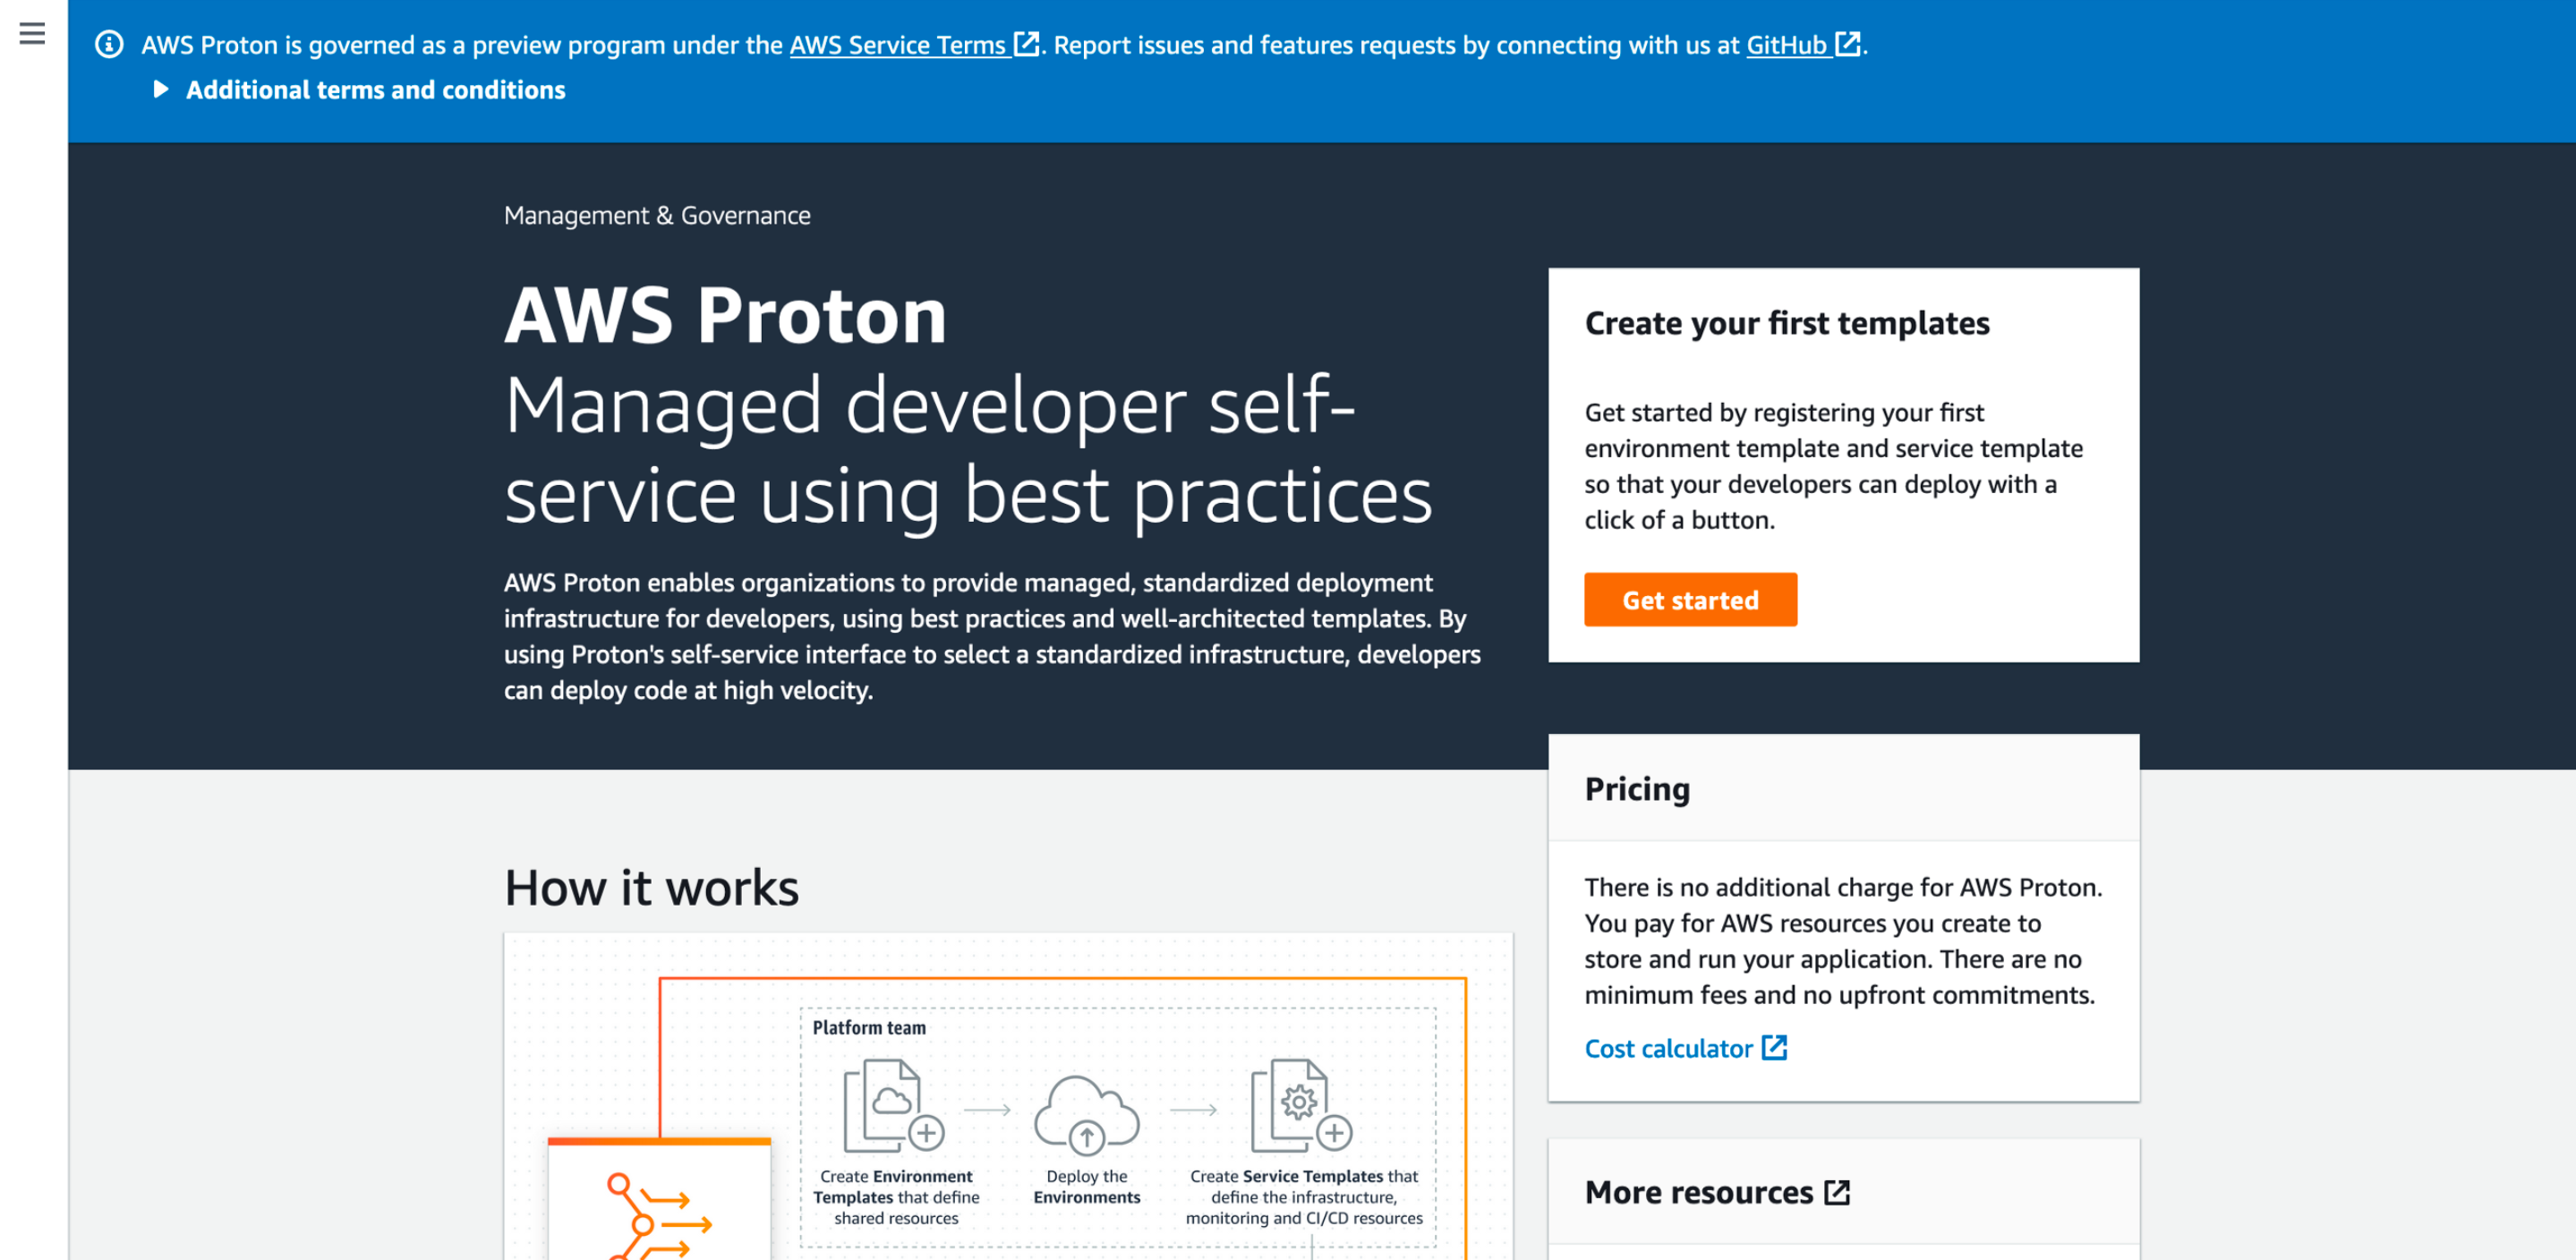
AWS Proton is a tool to help with infrastructure automation and code deployments.
But it is not another CodePipeline because the tool is more **designed for organizational purposes**.
This service makes it easy for infrastructure teams to centralize and standardize classic infrastructure patterns so that they can be available for developers to deploy their code.
And this why it should be seen as **an organizational tool**.
It support the technical design of your organization by providing a way to explicitly expose it to all teams building applications and products on top of this layer.
If you know AWS CI/CD environments, you will be happy to hear that Proton is for instance integrated with Code Pipeline and Cloudwatch.
Let’s see how we can quickly use AWS Proton to set up a lambda serverless environment.
## Connect to Github
* Let’s go to the [Proton page](https://console.aws.amazon.com/proton/home)
* On the menu on the right, we click on Source connection and create a GitHub connection.
## Set up for Proton
Here we will just create (or select) a role for Proton to use to deploy Cloudformation stacks.
* We go back to the [AWS Proton page](https://console.aws.amazon.com/proton/home) and click on Account roles
* Let’s create/update the role we will use to enable resource creation by Proton
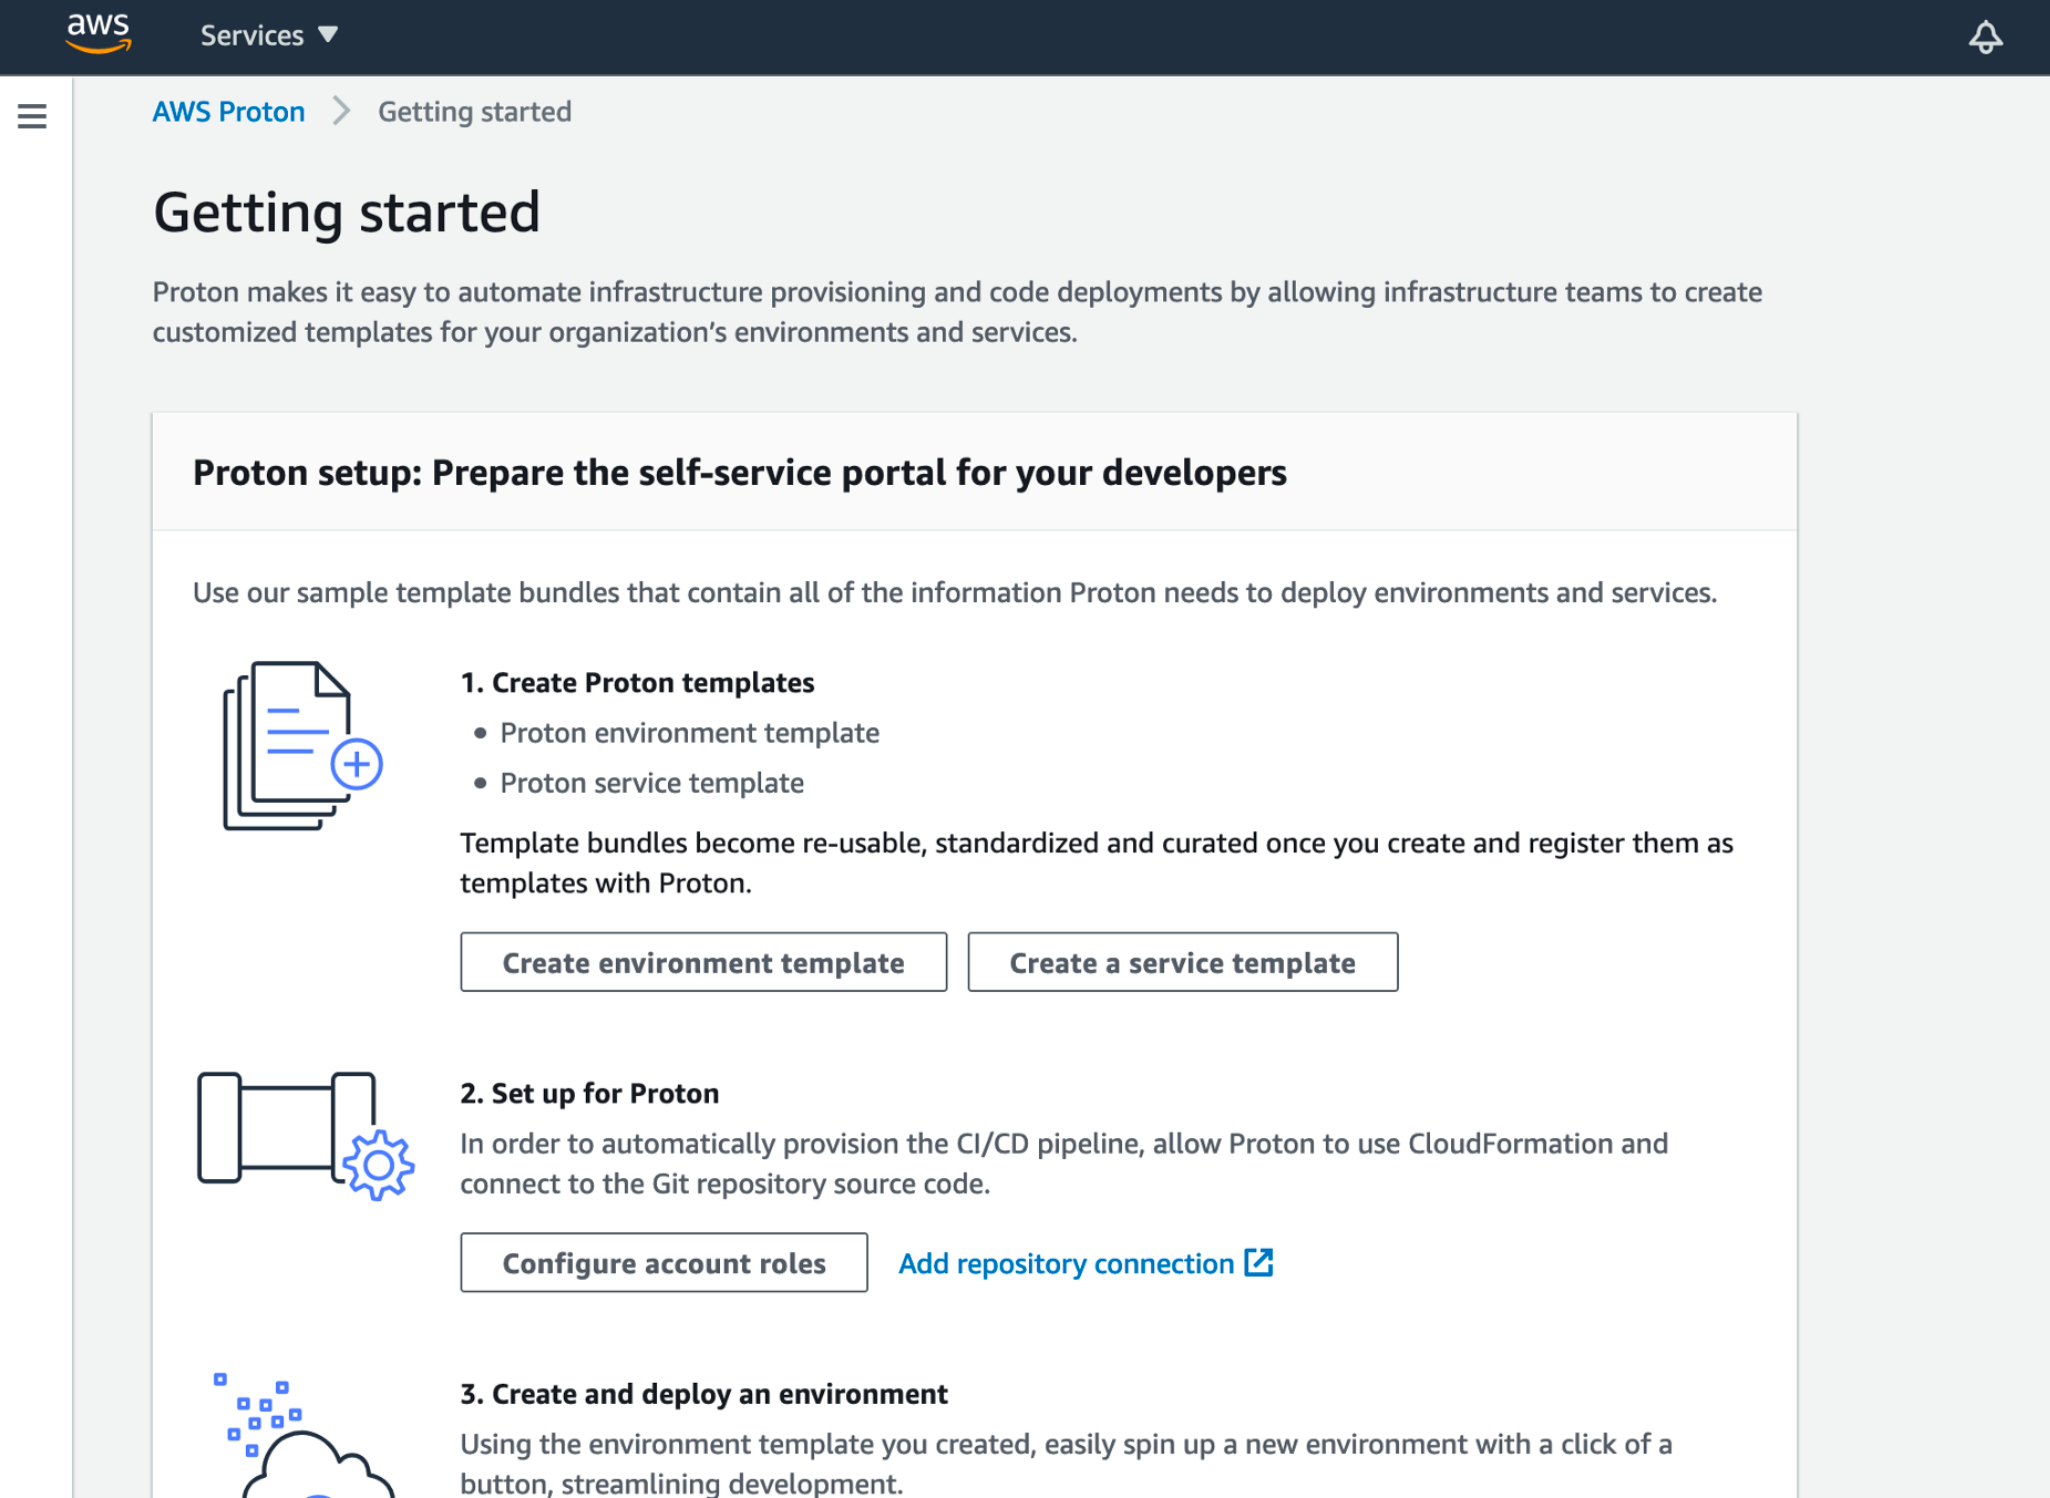
## Create proton environment template
* Let’s navigate to [AWS Proton](https://console.aws.amazon.com/proton/home) page and click on “Get started”
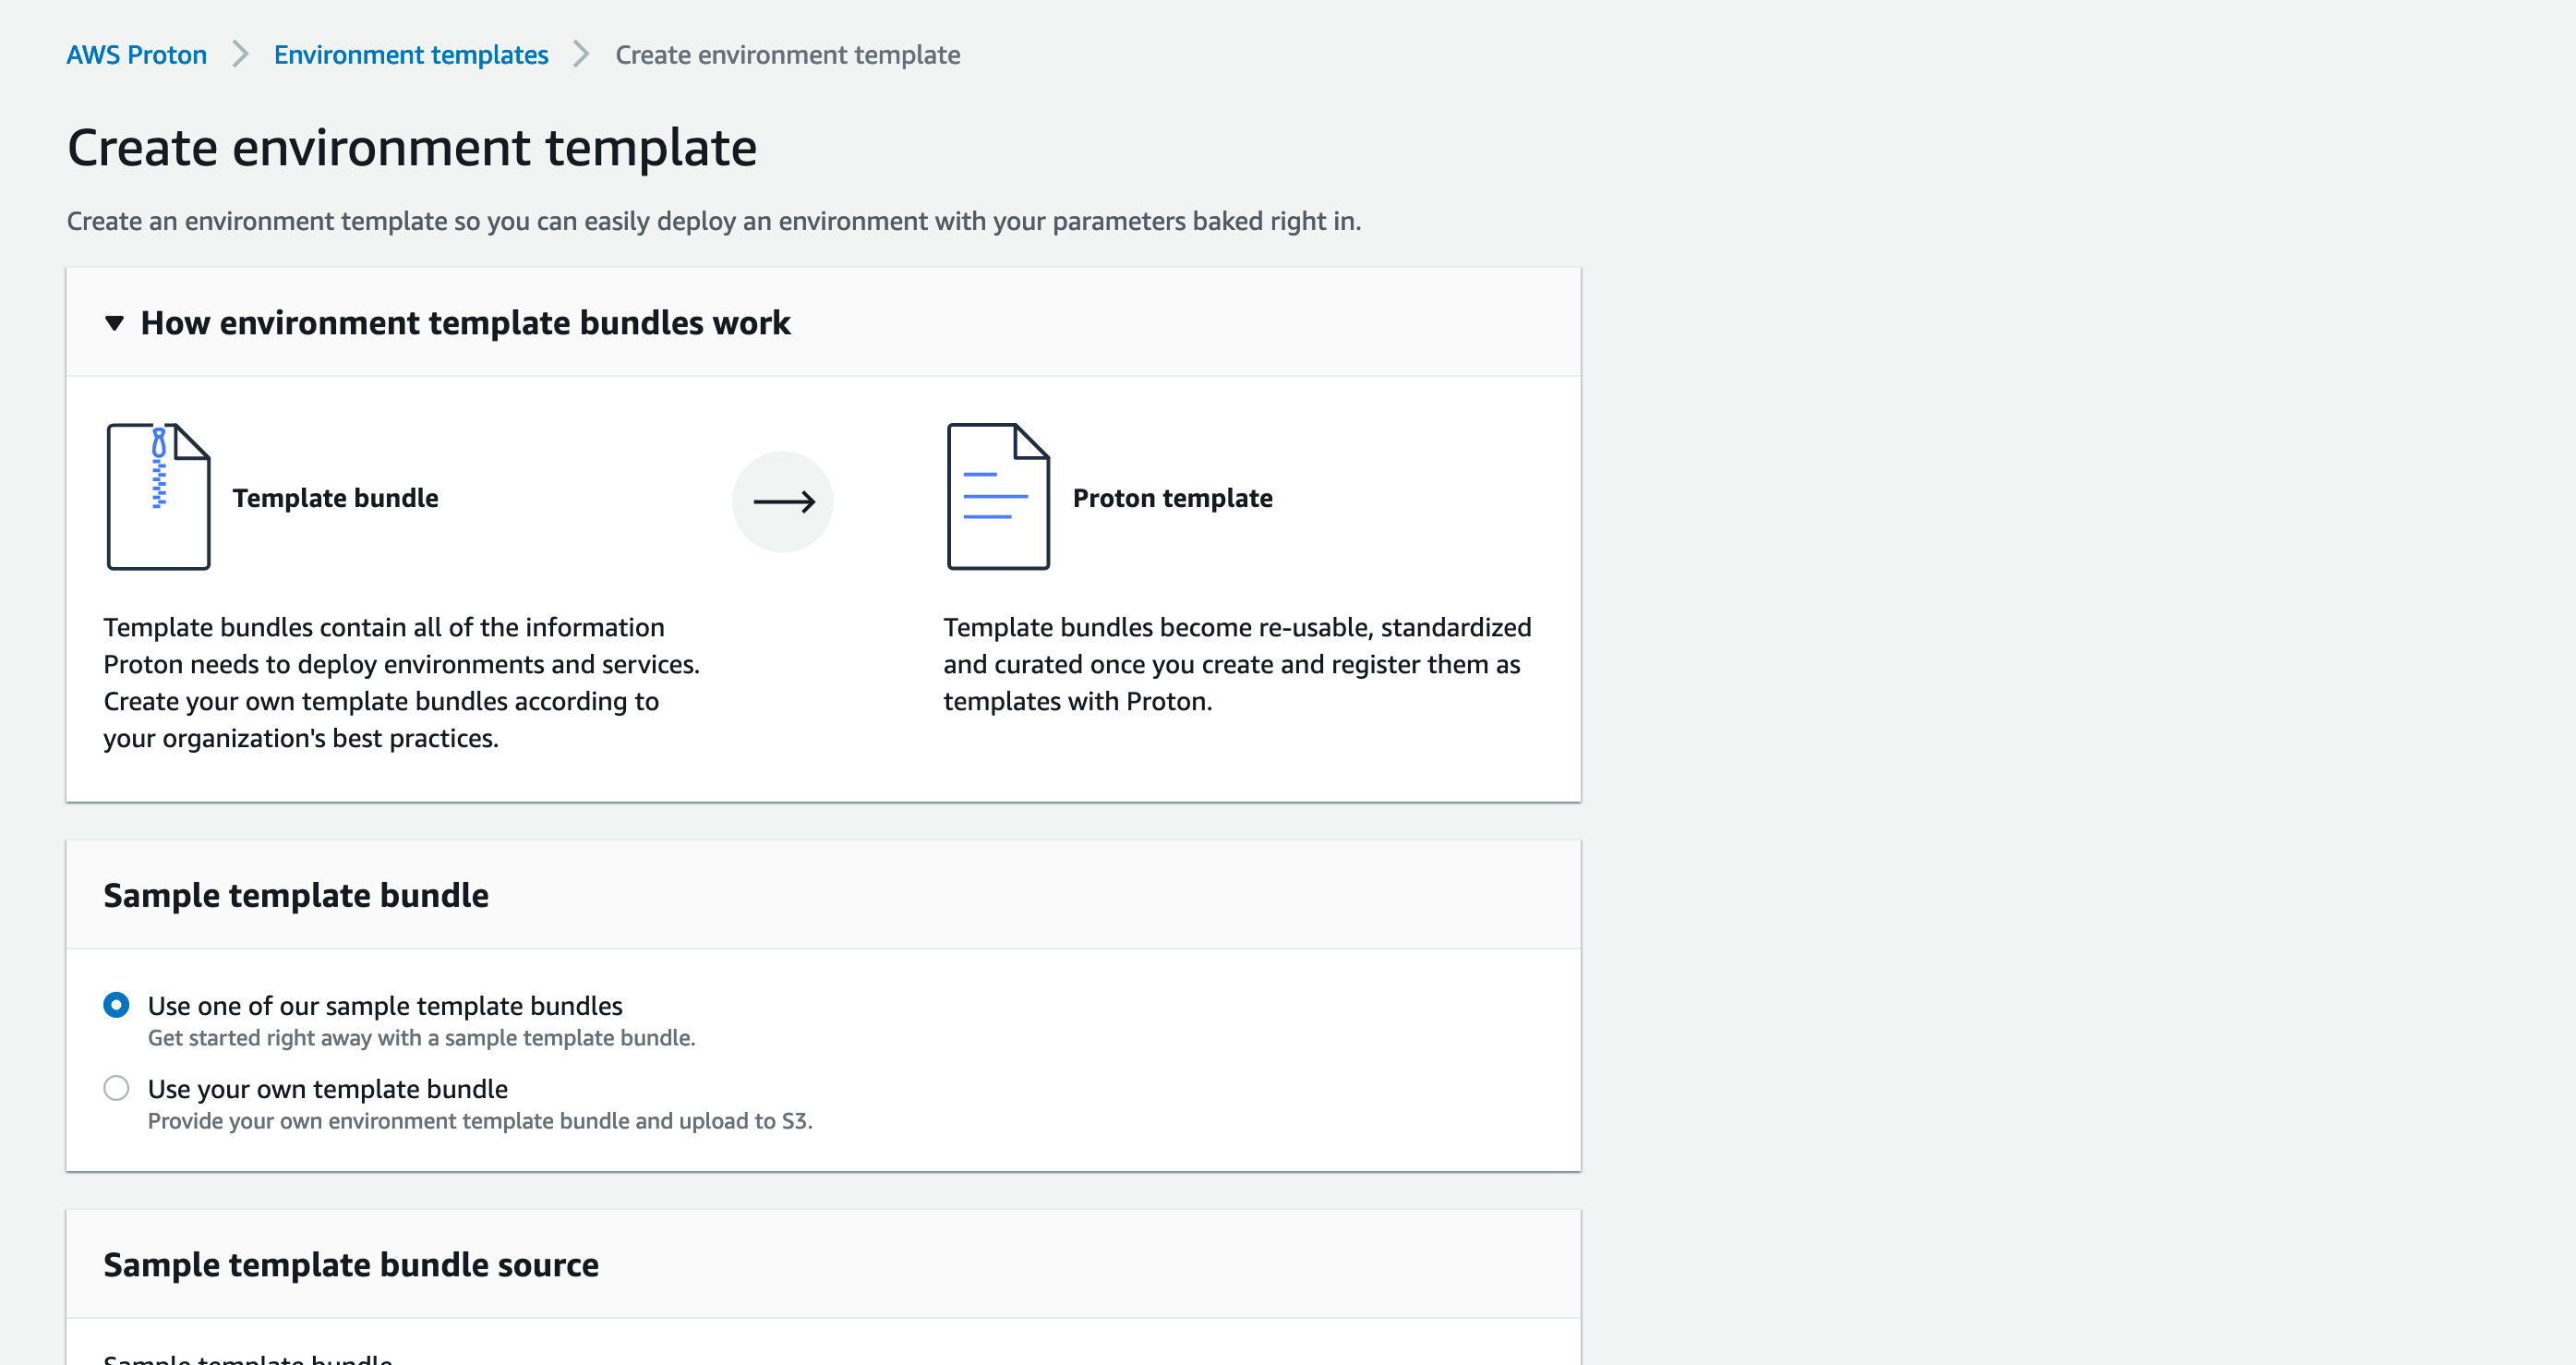
* We click on create environment template
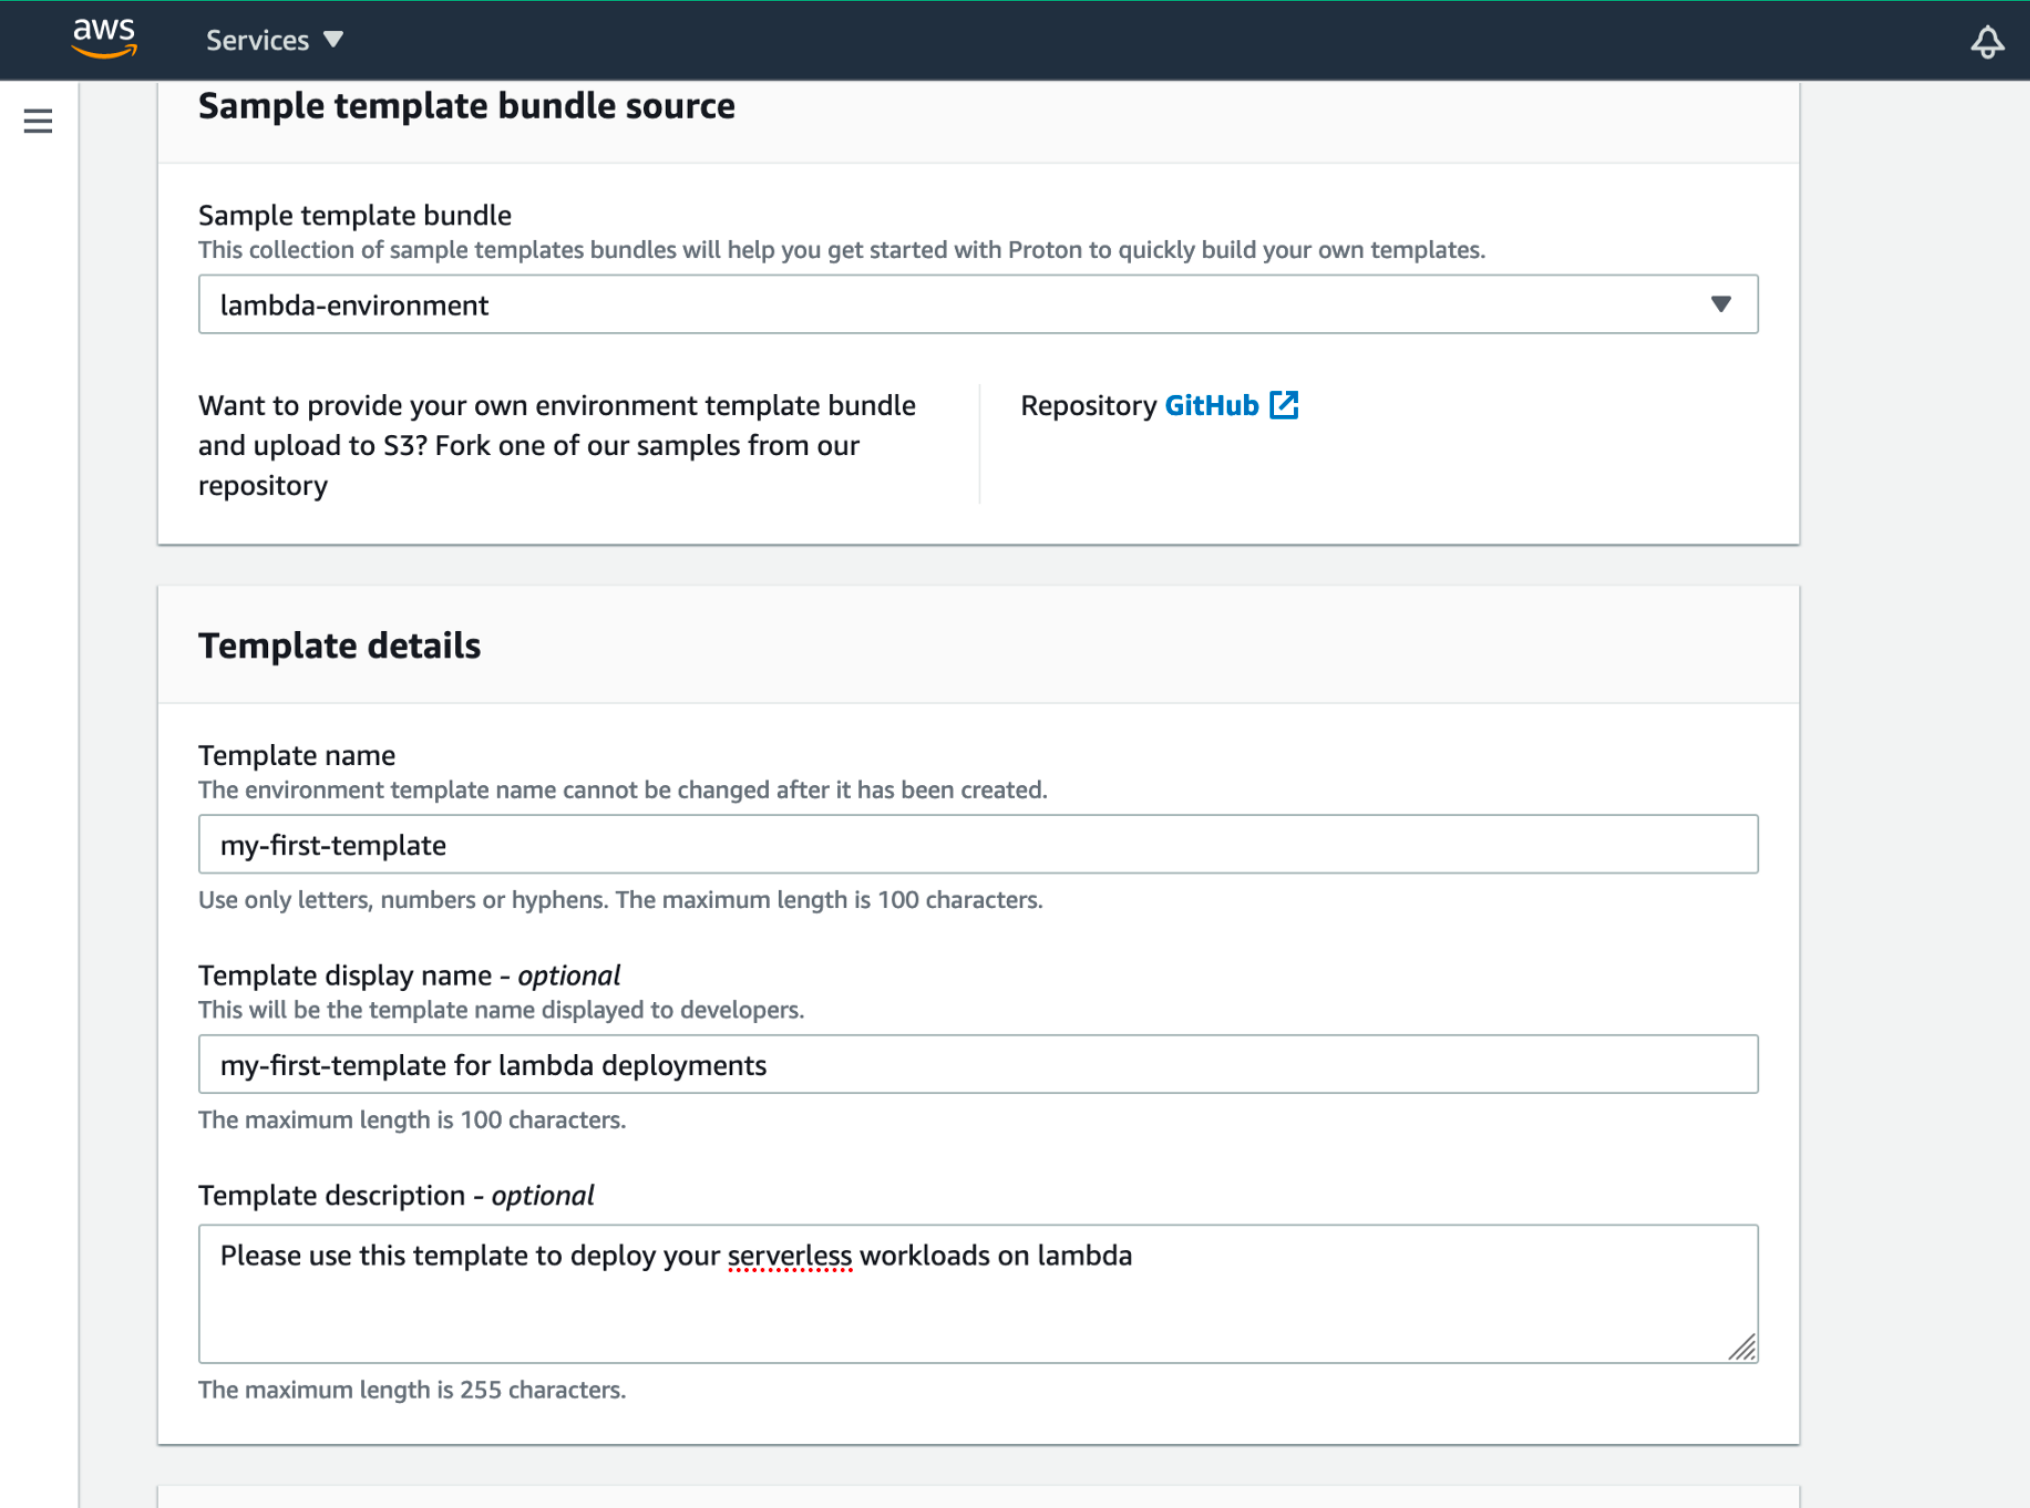
* Here, we can choose to provide our own template but for this example, we will use the AWS lambda one.
* Let’s fill all the information and hit create
That’s it, our environment template is created.
## Create and deploy an environment
Now, let’s create an environment from our environment template.
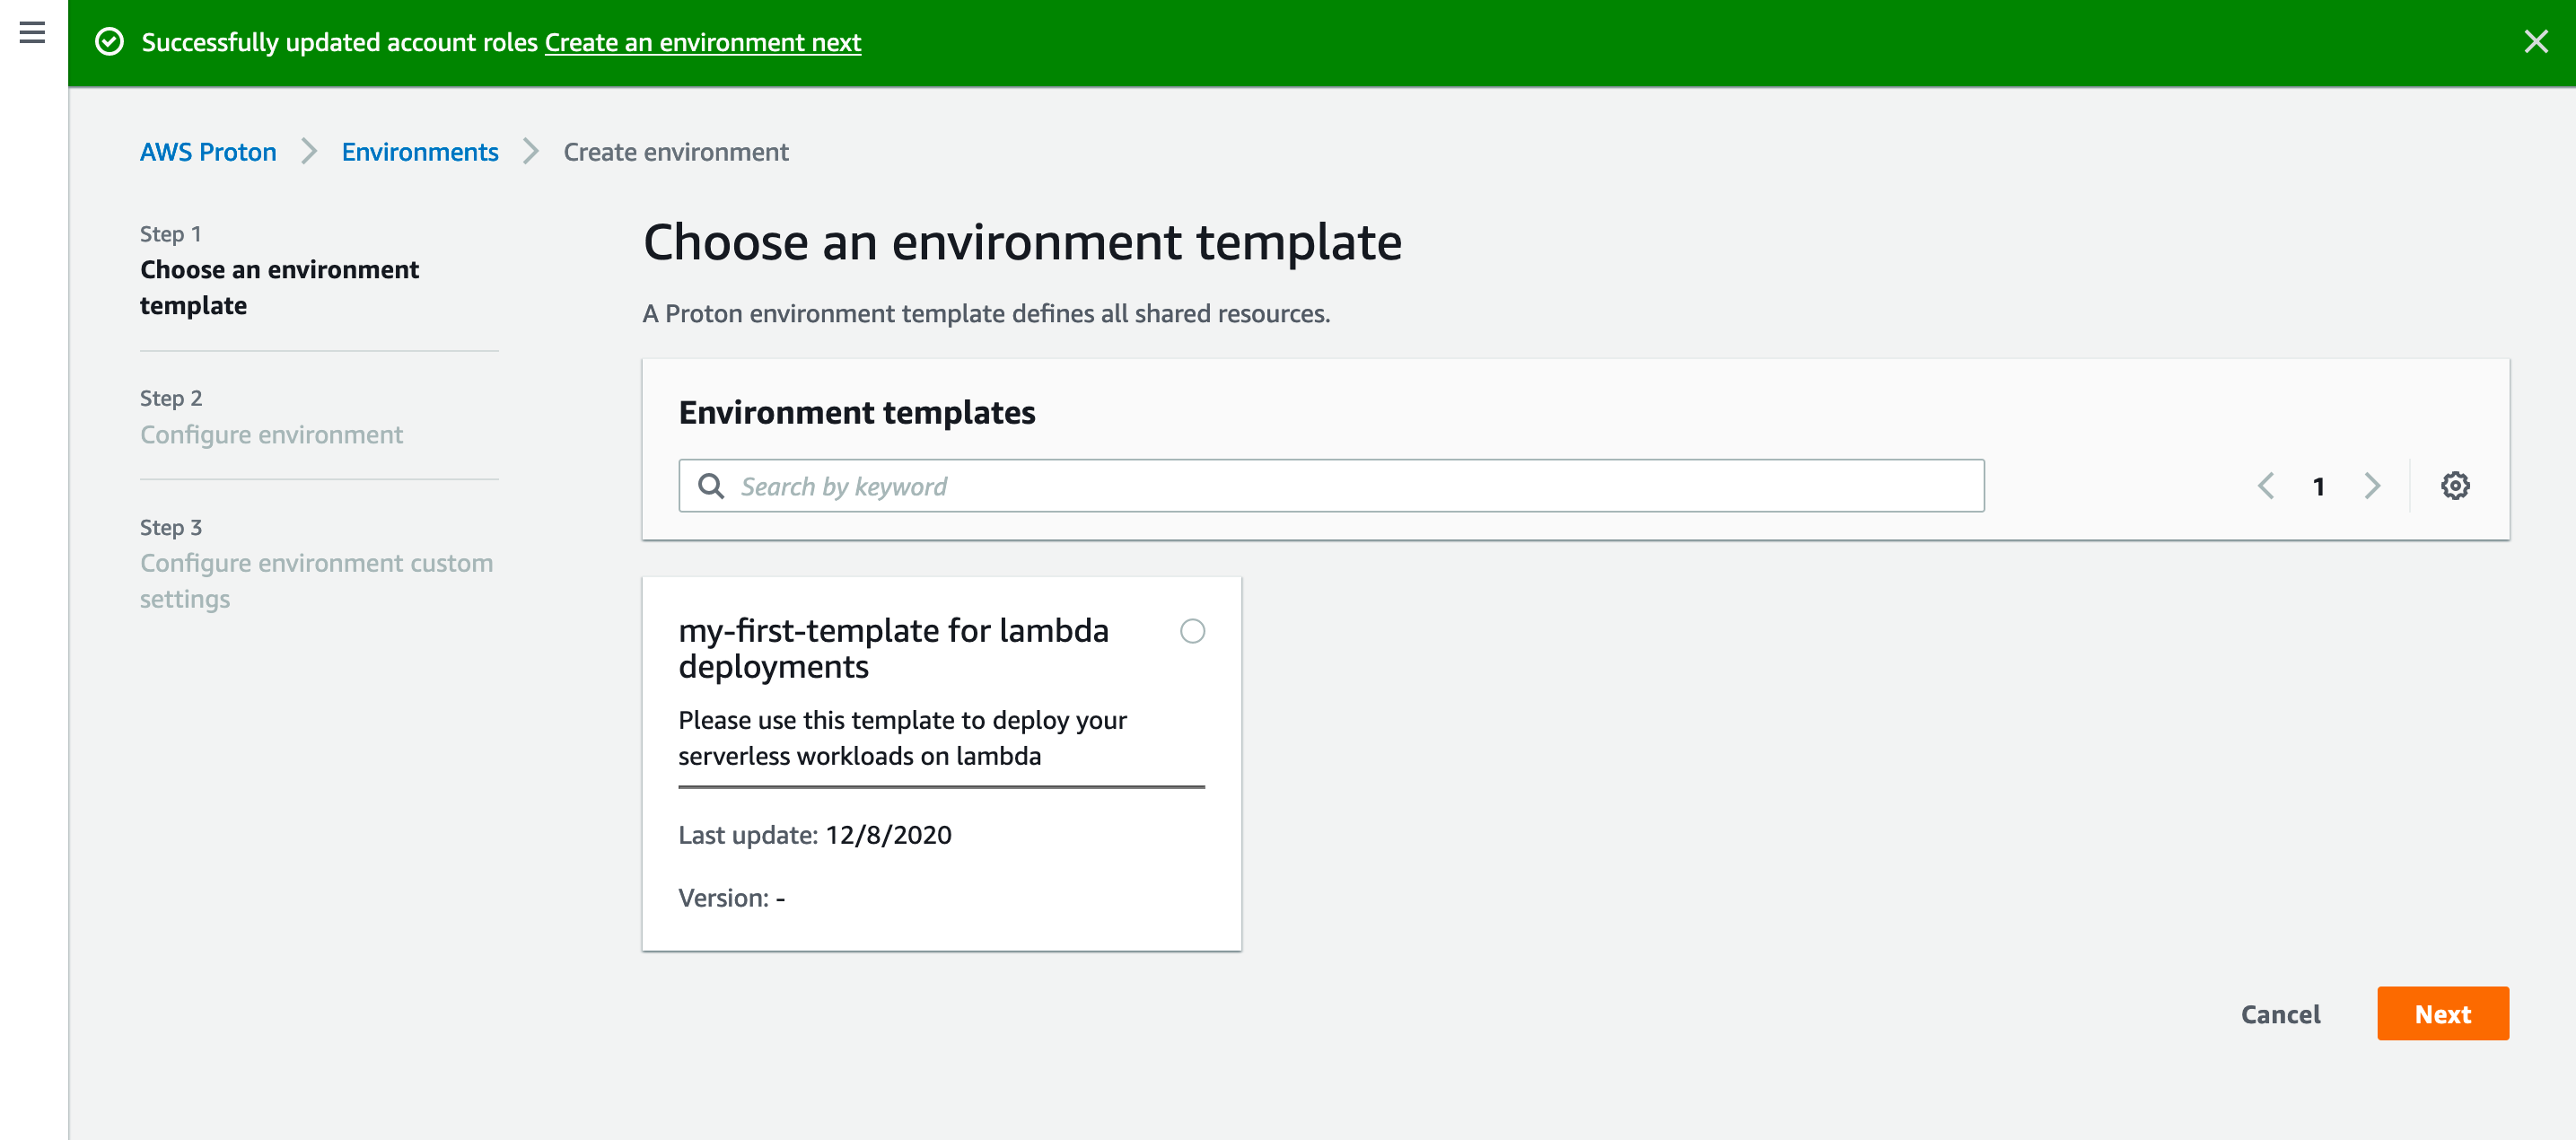
* On [AWS Proton page](https://console.aws.amazon.com/proton/home), we are going to click on “Environments” and “Create environment”
* We choose our previously created environment template
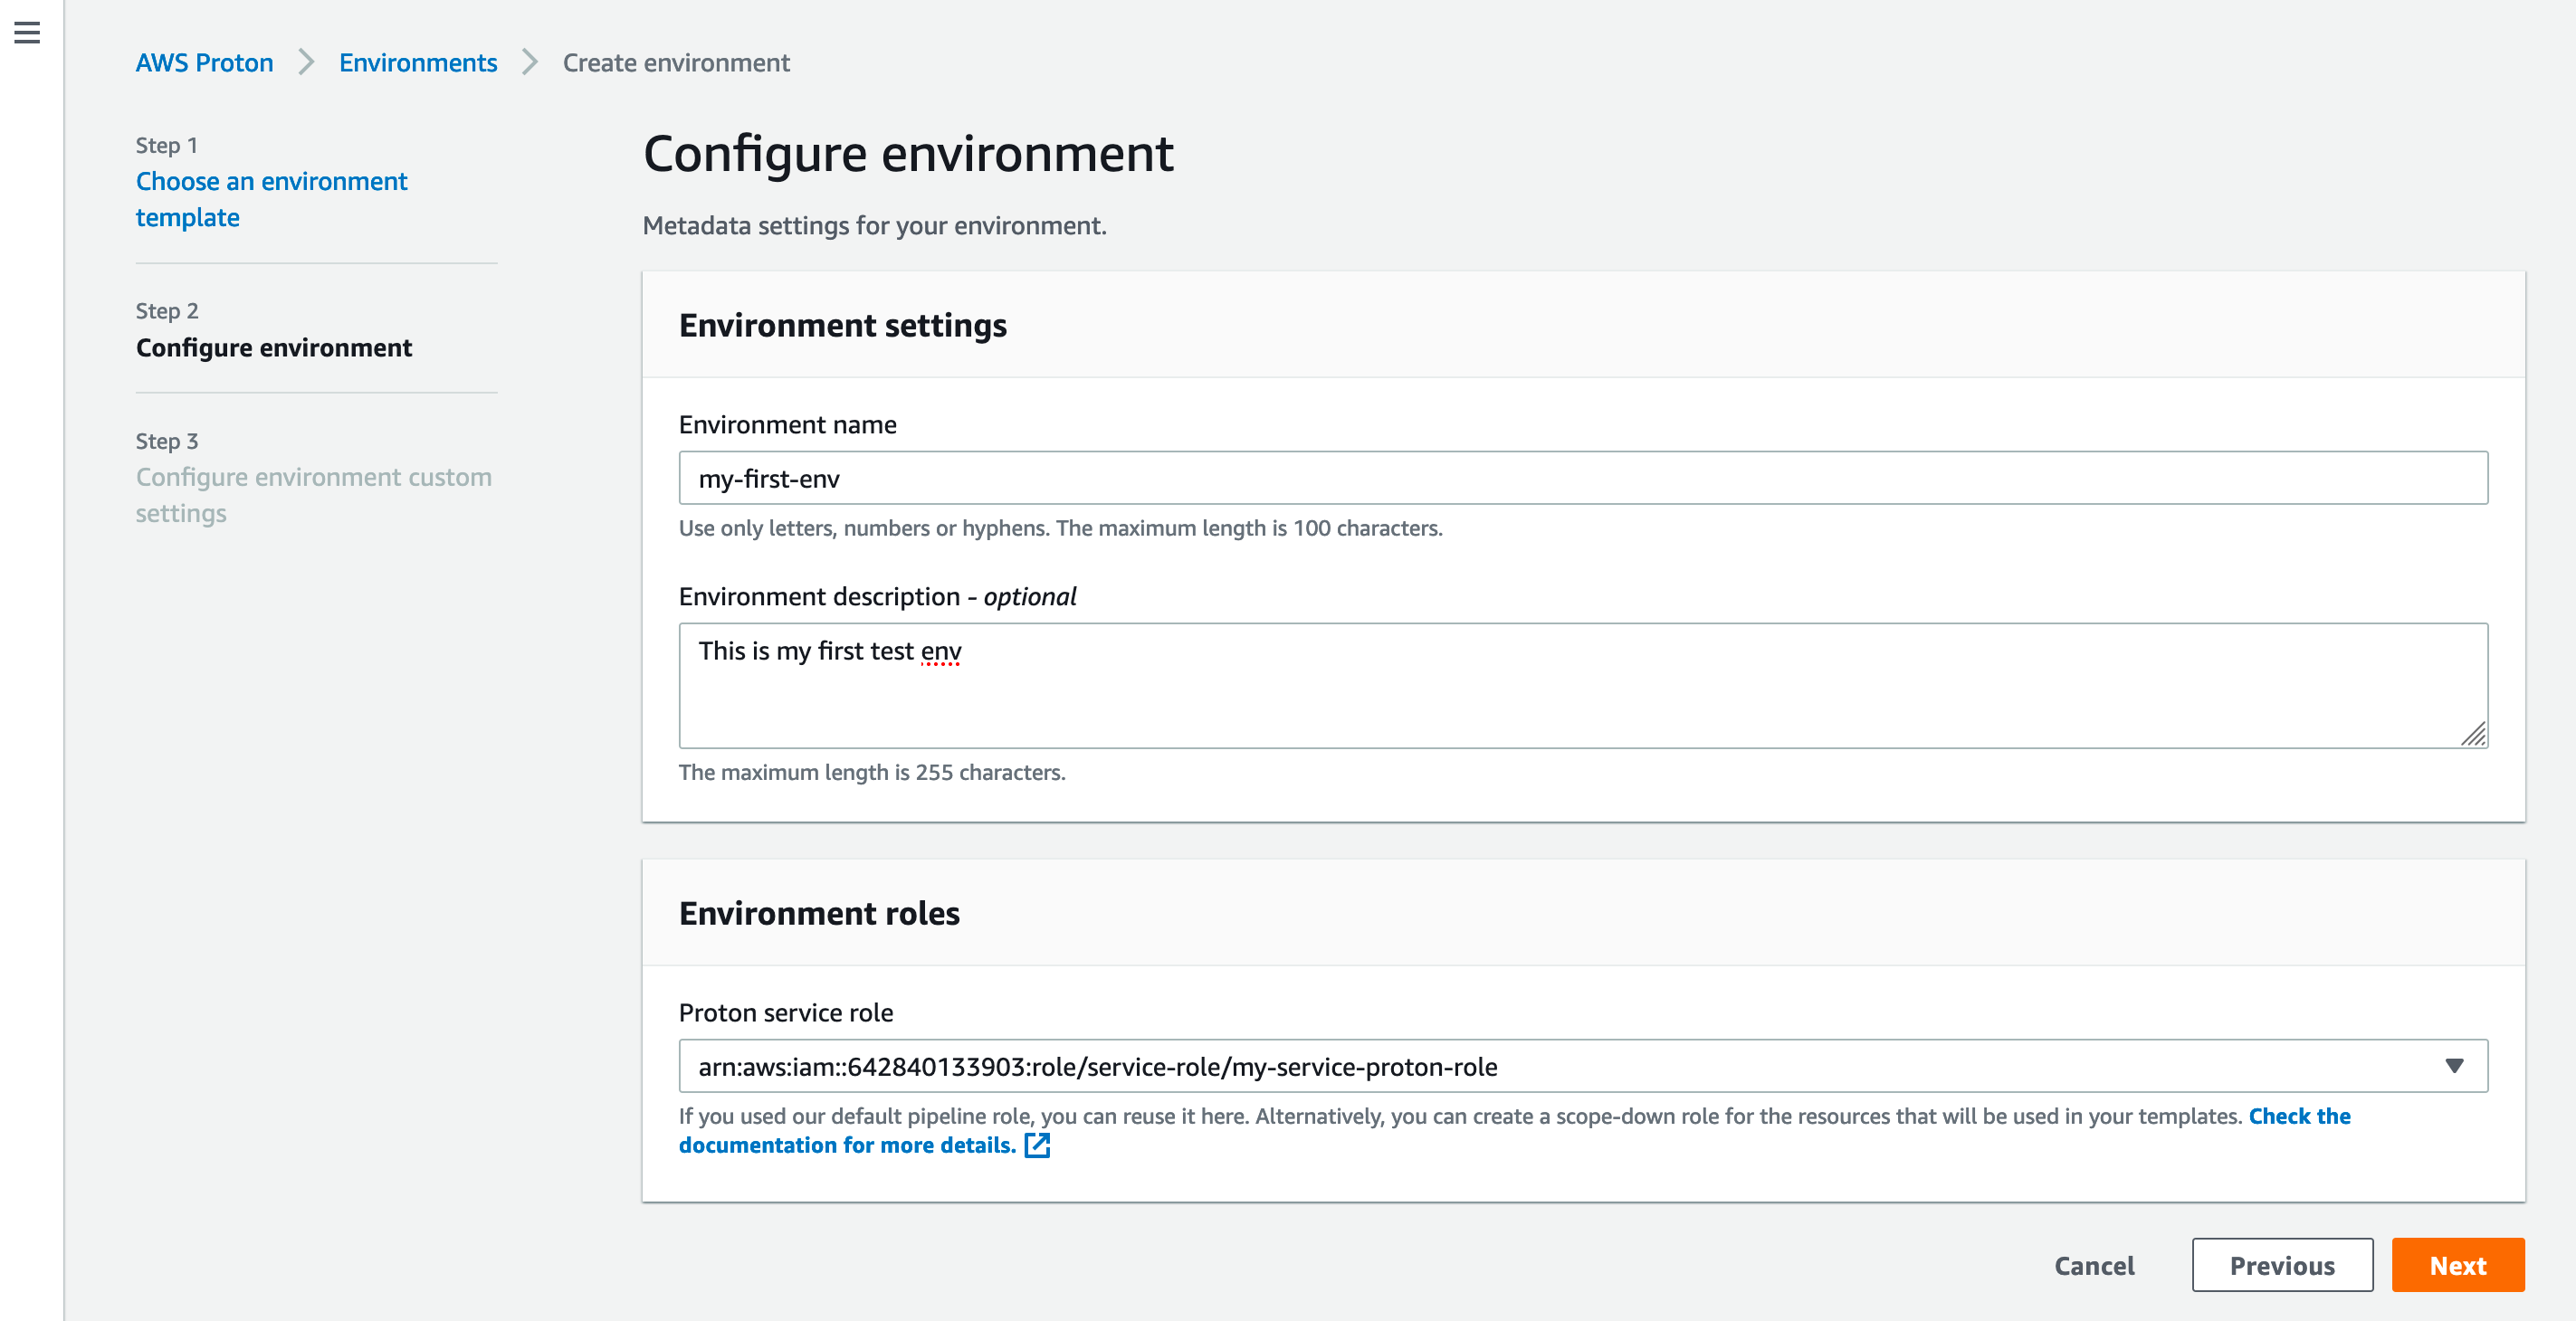
* Let’s fill the information as we want and provide the role we created at the beginning of the process
* Let’s fill the settings configured in the template
* We hit the “Create” button and wait for the creation to complete
We will see a new CloudFormation stack provisioning a DynamoDB table.
## Create a service template
Let’s do the same process for the service part
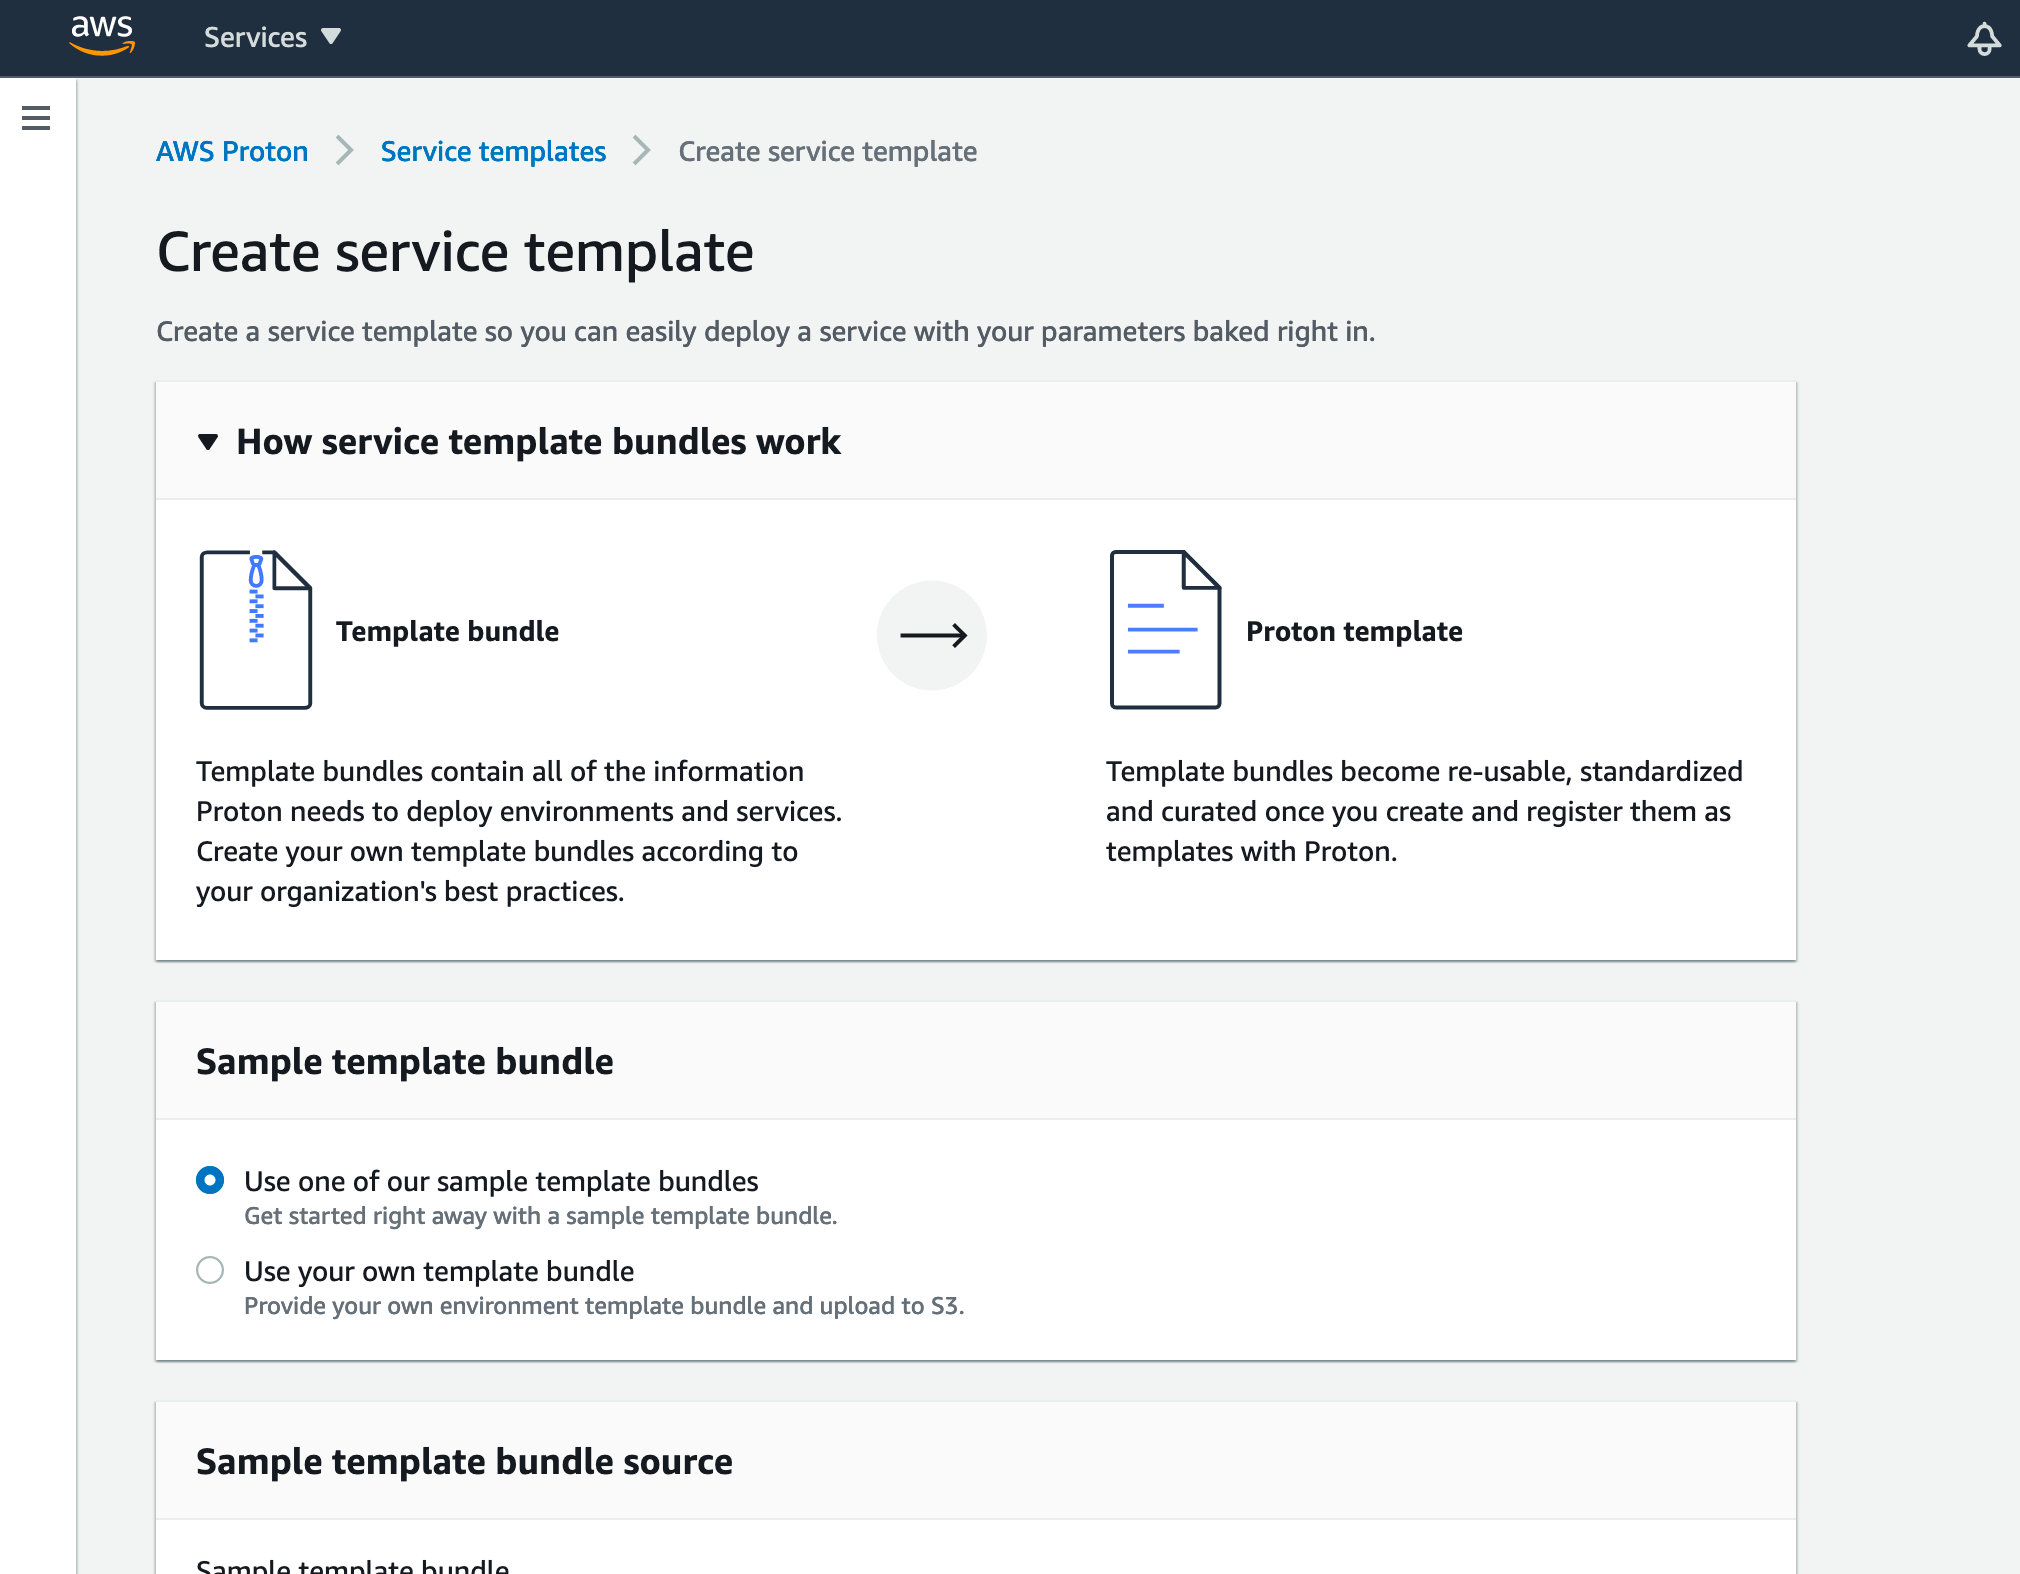
* Let’s go to Proton page and click “Service templates” and “Create service template”
* As for the environment, we will use the sample lambda template
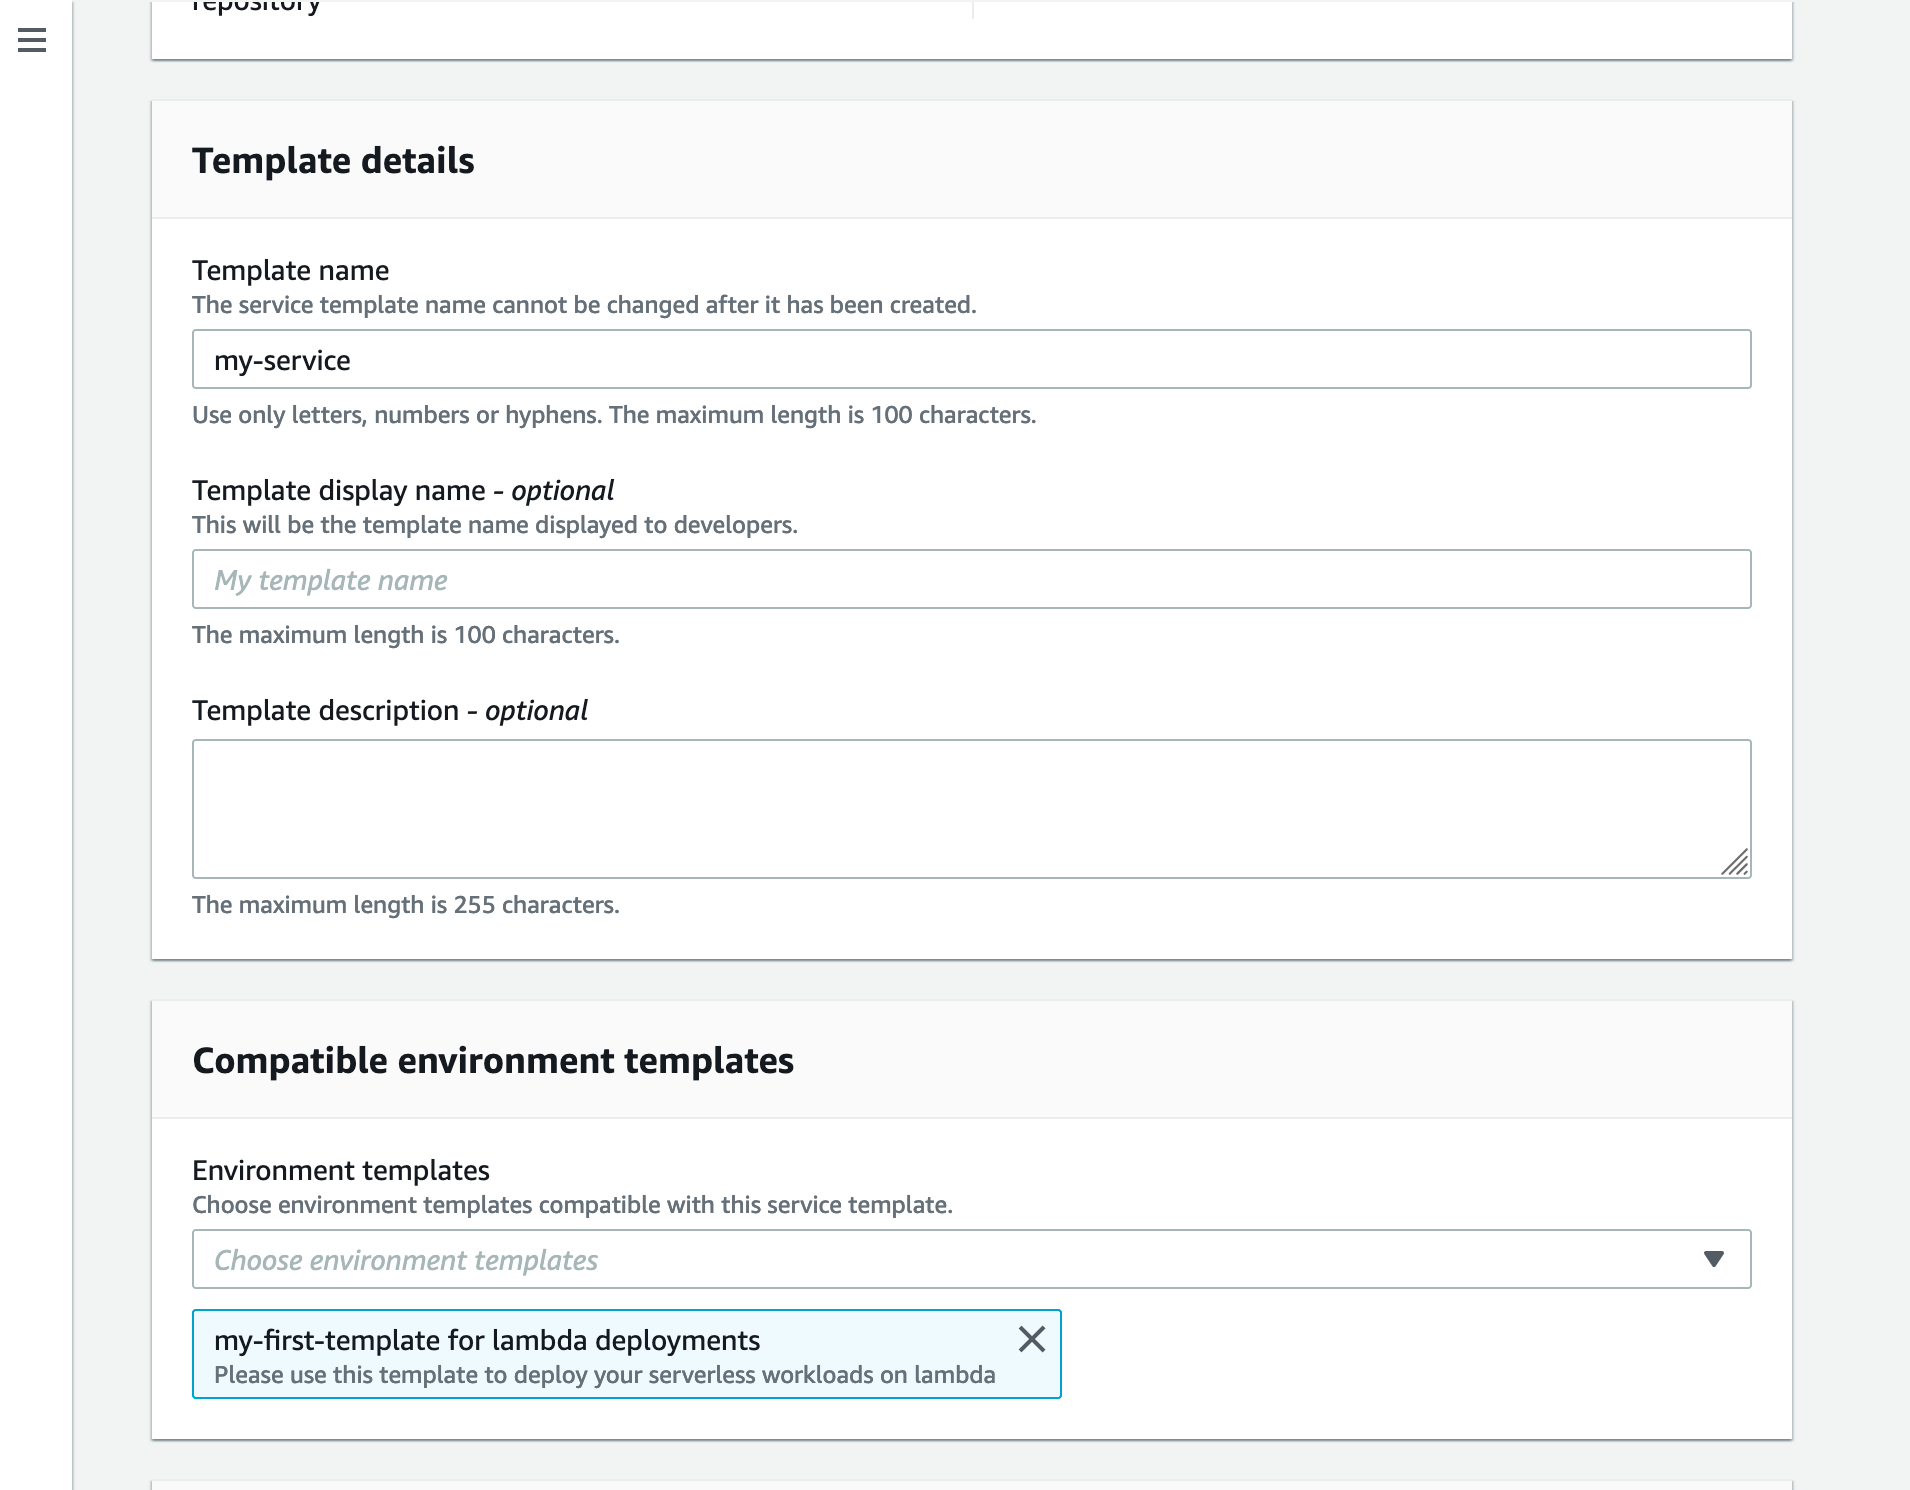
* Let’s fill the information and choose the environment template we created in the previous steps
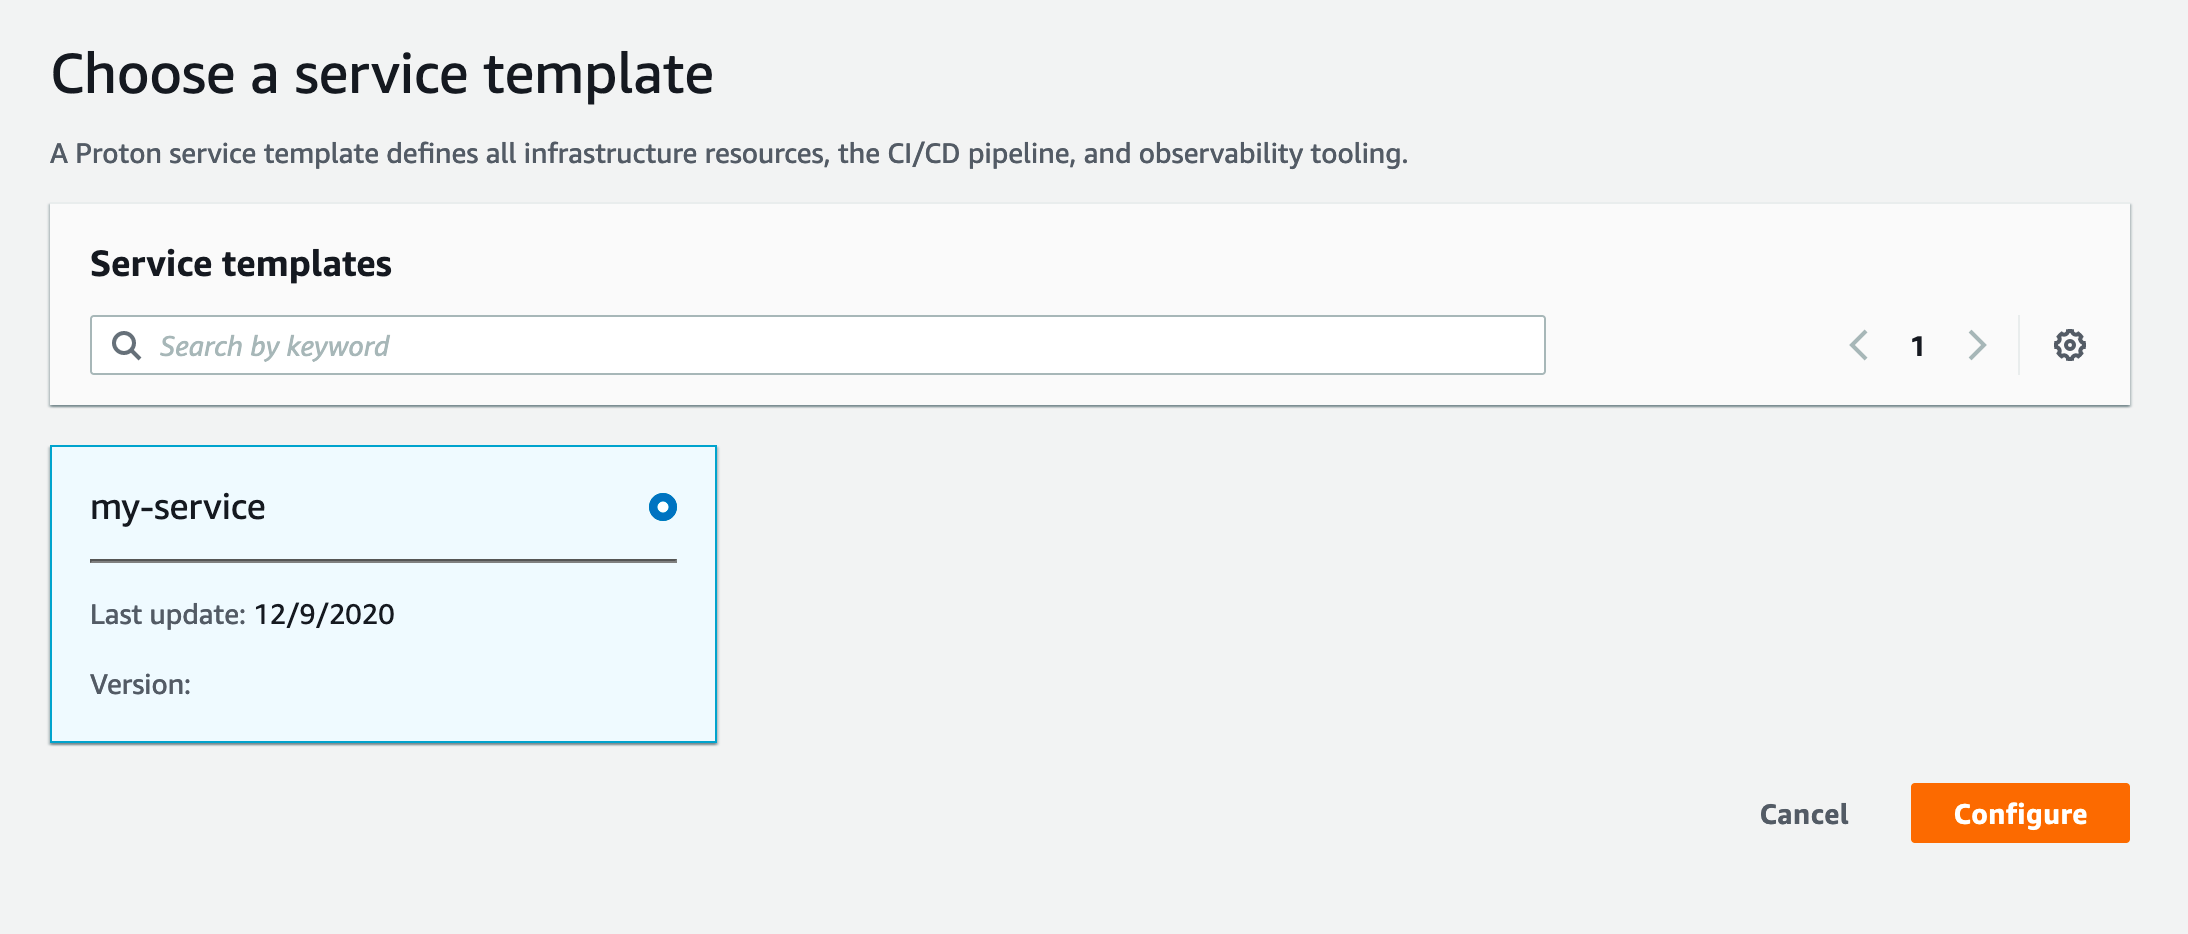
* And we click “Create”
Here we are with our service template
## Create the service
Now we are going to create a service and its service instance from the service template.
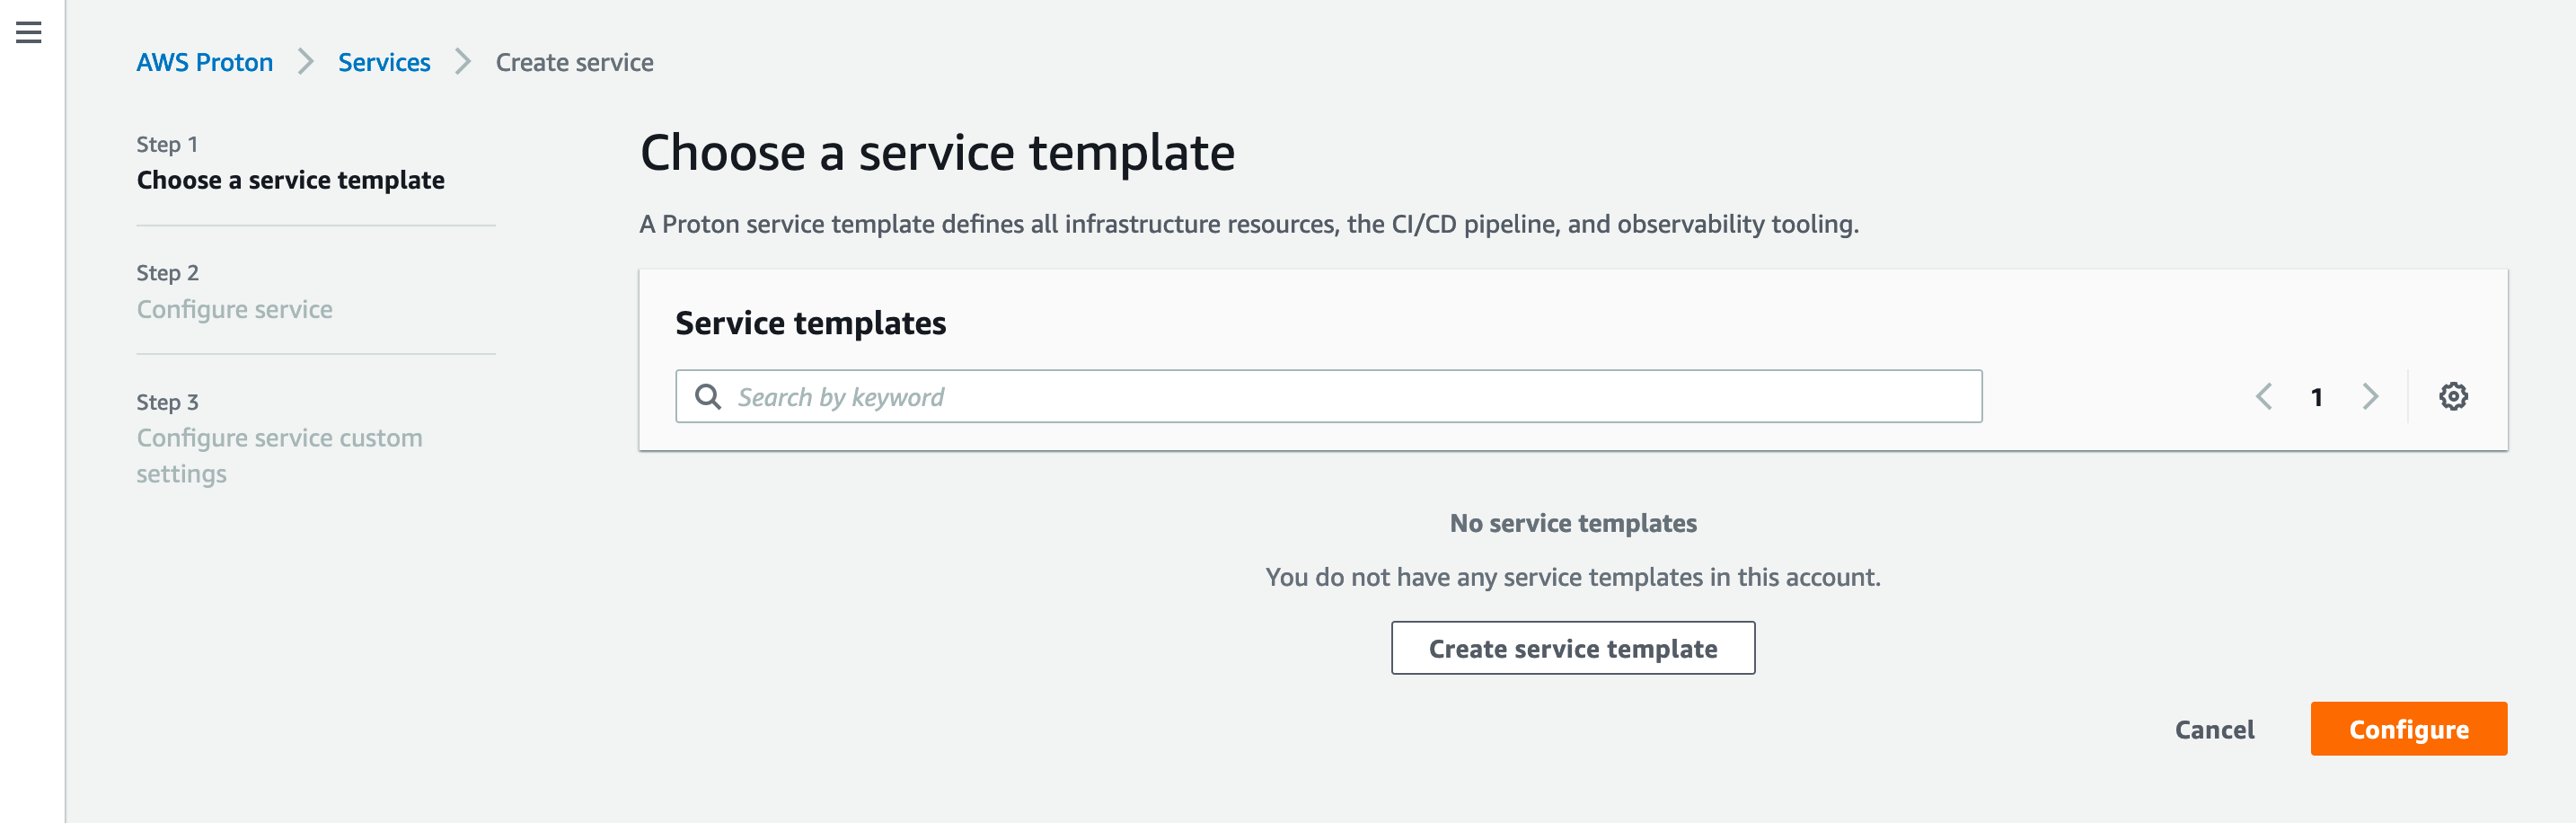
* On the [AWS Proton page](https://console.aws.amazon.com/proton/home), we click on “Services” and “Create service”
* We choose our template
* And fill the information with the branch name and the GitHub repository
_You can find some code sample in_ [_this repository_](https://github.com/aws-samples/aws-proton-sample-templates)_._
When the deployment is completed, we are able to reach our service using the provided url.
We can use this newly created Proton structure for our future deployments.
## Conclusion
We were able in a few minutes to set up an entire Proton process. And we have just touched how powerful it can be on a scaling and governance perspective.
Here are some AWS Proton major benefits:
* Developers can deploy safely their applications without having to manage the deployment infrastructure and CI/CD
* It works with containers and serverless stacks
* Proton provides **consistent architecture across projects**
* Easy **infrastructure-as-code** organization by design
* **No additional charges**, you pay only the resources created by your templates
This article was just an introduction on the topic. I encourage you to experiment the tool and create your own templates to match your business use cases.
For an enlightened point of view of AWS Proton, I recommand the excellent article of [Forrest Brazeal](https://medium.com/u/b8d1e8a0e0d8?source=post_page-----1130c438450f--------------------------------) for [A Cloud Guru](https://medium.com/u/c73bfd51b440?source=post_page-----1130c438450f--------------------------------):
%[https://acloudguru.com/blog/engineering/aws-proton-is-conways-law-as-a-service]
**AWS is providing us with a new kind of tool that can help organizations on their daily struggle about quick response applications, innovation and process optimization. AWS Proton is still in its baby phase and will certainly be improved but this intriguing tool is already able to change the way we think about environment and pipeline management.**
_Feel free to reach me on_ [_Twitter (@FlolightC)_](https://twitter.com/FlolightC) _to tell me about your Proton use case or to ask me questions ! I’m always happy to discuss with you !_
 AWS recently announced a new service: AWS Proton.
As I love to have a look at the new features provided by the AWS re:Invent, I wrote this article summarizing my findings.
AWS Proton is a tool to help with infrastructure automation and code deployments.
But it is not another CodePipeline because the tool is more **designed for organizational purposes**.
This service makes it easy for infrastructure teams to centralize and standardize classic infrastructure patterns so that they can be available for developers to deploy their code.
And this why it should be seen as **an organizational tool**.
It support the technical design of your organization by providing a way to explicitly expose it to all teams building applications and products on top of this layer.
If you know AWS CI/CD environments, you will be happy to hear that Proton is for instance integrated with Code Pipeline and Cloudwatch.
Let’s see how we can quickly use AWS Proton to set up a lambda serverless environment.
## Connect to Github
* Let’s go to the [Proton page](https://console.aws.amazon.com/proton/home)
* On the menu on the right, we click on Source connection and create a GitHub connection.
AWS recently announced a new service: AWS Proton.
As I love to have a look at the new features provided by the AWS re:Invent, I wrote this article summarizing my findings.
AWS Proton is a tool to help with infrastructure automation and code deployments.
But it is not another CodePipeline because the tool is more **designed for organizational purposes**.
This service makes it easy for infrastructure teams to centralize and standardize classic infrastructure patterns so that they can be available for developers to deploy their code.
And this why it should be seen as **an organizational tool**.
It support the technical design of your organization by providing a way to explicitly expose it to all teams building applications and products on top of this layer.
If you know AWS CI/CD environments, you will be happy to hear that Proton is for instance integrated with Code Pipeline and Cloudwatch.
Let’s see how we can quickly use AWS Proton to set up a lambda serverless environment.
## Connect to Github
* Let’s go to the [Proton page](https://console.aws.amazon.com/proton/home)
* On the menu on the right, we click on Source connection and create a GitHub connection.
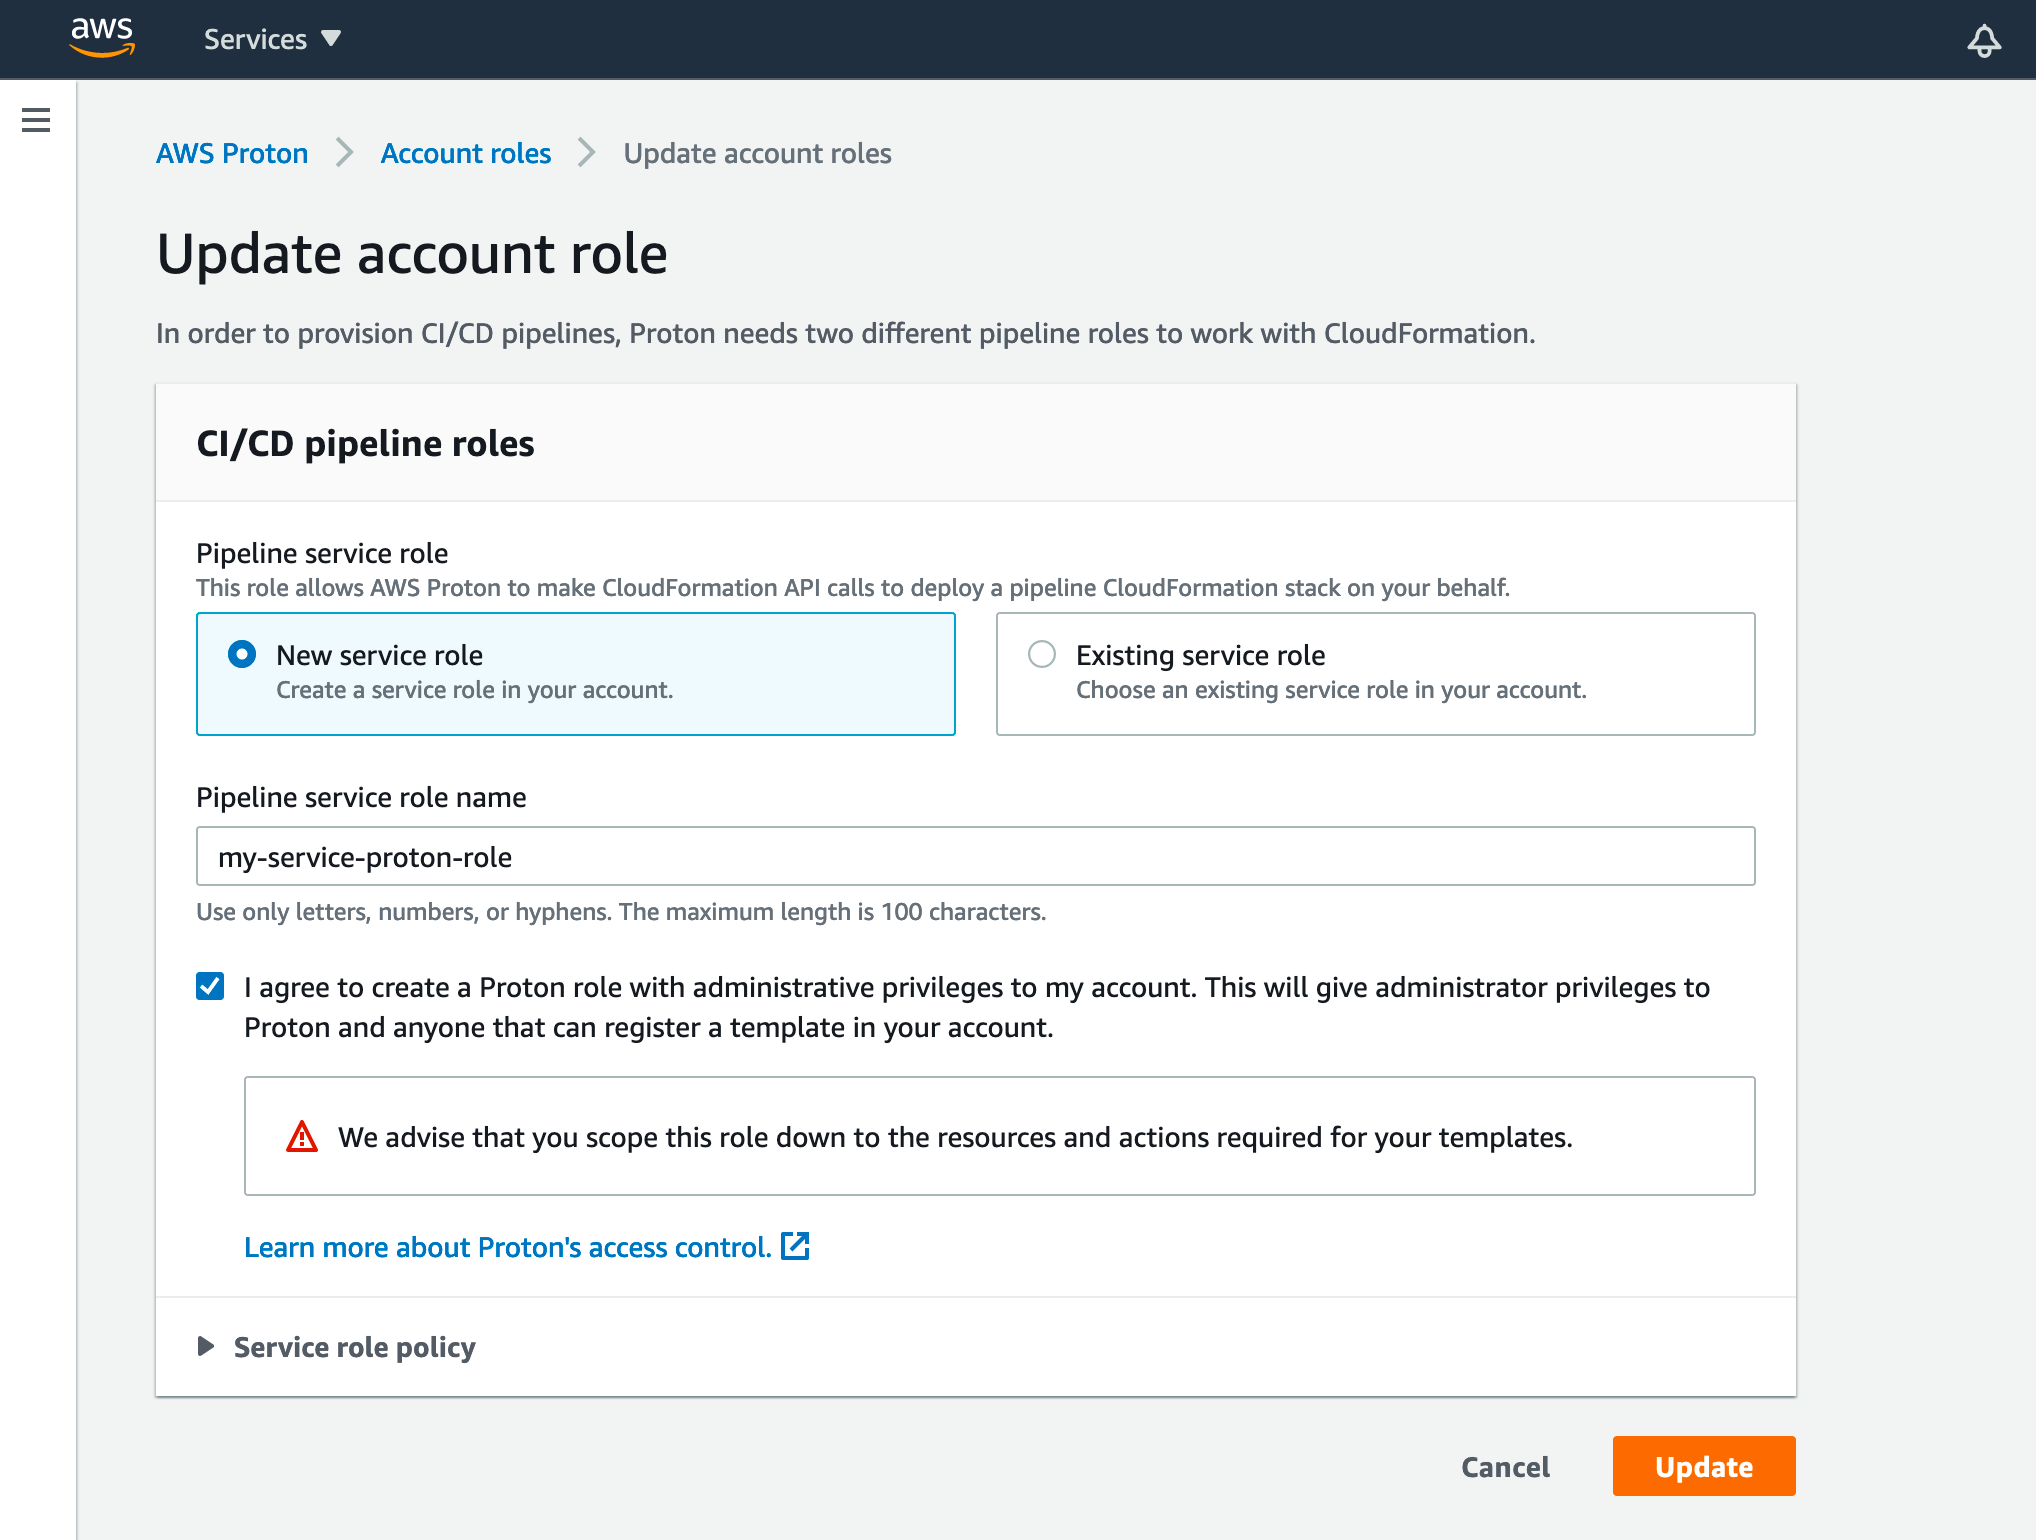
 ## Set up for Proton
Here we will just create (or select) a role for Proton to use to deploy Cloudformation stacks.
* We go back to the [AWS Proton page](https://console.aws.amazon.com/proton/home) and click on Account roles
## Set up for Proton
Here we will just create (or select) a role for Proton to use to deploy Cloudformation stacks.
* We go back to the [AWS Proton page](https://console.aws.amazon.com/proton/home) and click on Account roles
 * Let’s create/update the role we will use to enable resource creation by Proton
 ## Create proton environment template
* Let’s navigate to [AWS Proton](https://console.aws.amazon.com/proton/home) page and click on “Get started”
## Create proton environment template
* Let’s navigate to [AWS Proton](https://console.aws.amazon.com/proton/home) page and click on “Get started”
 * We click on create environment template
 * Here, we can choose to provide our own template but for this example, we will use the AWS lambda one.
 * Let’s fill all the information and hit create
 That’s it, our environment template is created.
## Create and deploy an environment
Now, let’s create an environment from our environment template.
* On [AWS Proton page](https://console.aws.amazon.com/proton/home), we are going to click on “Environments” and “Create environment”
* We choose our previously created environment template
That’s it, our environment template is created.
## Create and deploy an environment
Now, let’s create an environment from our environment template.
* On [AWS Proton page](https://console.aws.amazon.com/proton/home), we are going to click on “Environments” and “Create environment”
* We choose our previously created environment template
 * Let’s fill the information as we want and provide the role we created at the beginning of the process
 * Let’s fill the settings configured in the template
 * We hit the “Create” button and wait for the creation to complete

 We will see a new CloudFormation stack provisioning a DynamoDB table.
## Create a service template
Let’s do the same process for the service part
* Let’s go to Proton page and click “Service templates” and “Create service template”
We will see a new CloudFormation stack provisioning a DynamoDB table.
## Create a service template
Let’s do the same process for the service part
* Let’s go to Proton page and click “Service templates” and “Create service template”
 * As for the environment, we will use the sample lambda template
 * Let’s fill the information and choose the environment template we created in the previous steps
 * And we click “Create”
Here we are with our service template
## Create the service
Now we are going to create a service and its service instance from the service template.
* On the [AWS Proton page](https://console.aws.amazon.com/proton/home), we click on “Services” and “Create service”
* We choose our template
* And we click “Create”
Here we are with our service template
## Create the service
Now we are going to create a service and its service instance from the service template.
* On the [AWS Proton page](https://console.aws.amazon.com/proton/home), we click on “Services” and “Create service”
* We choose our template
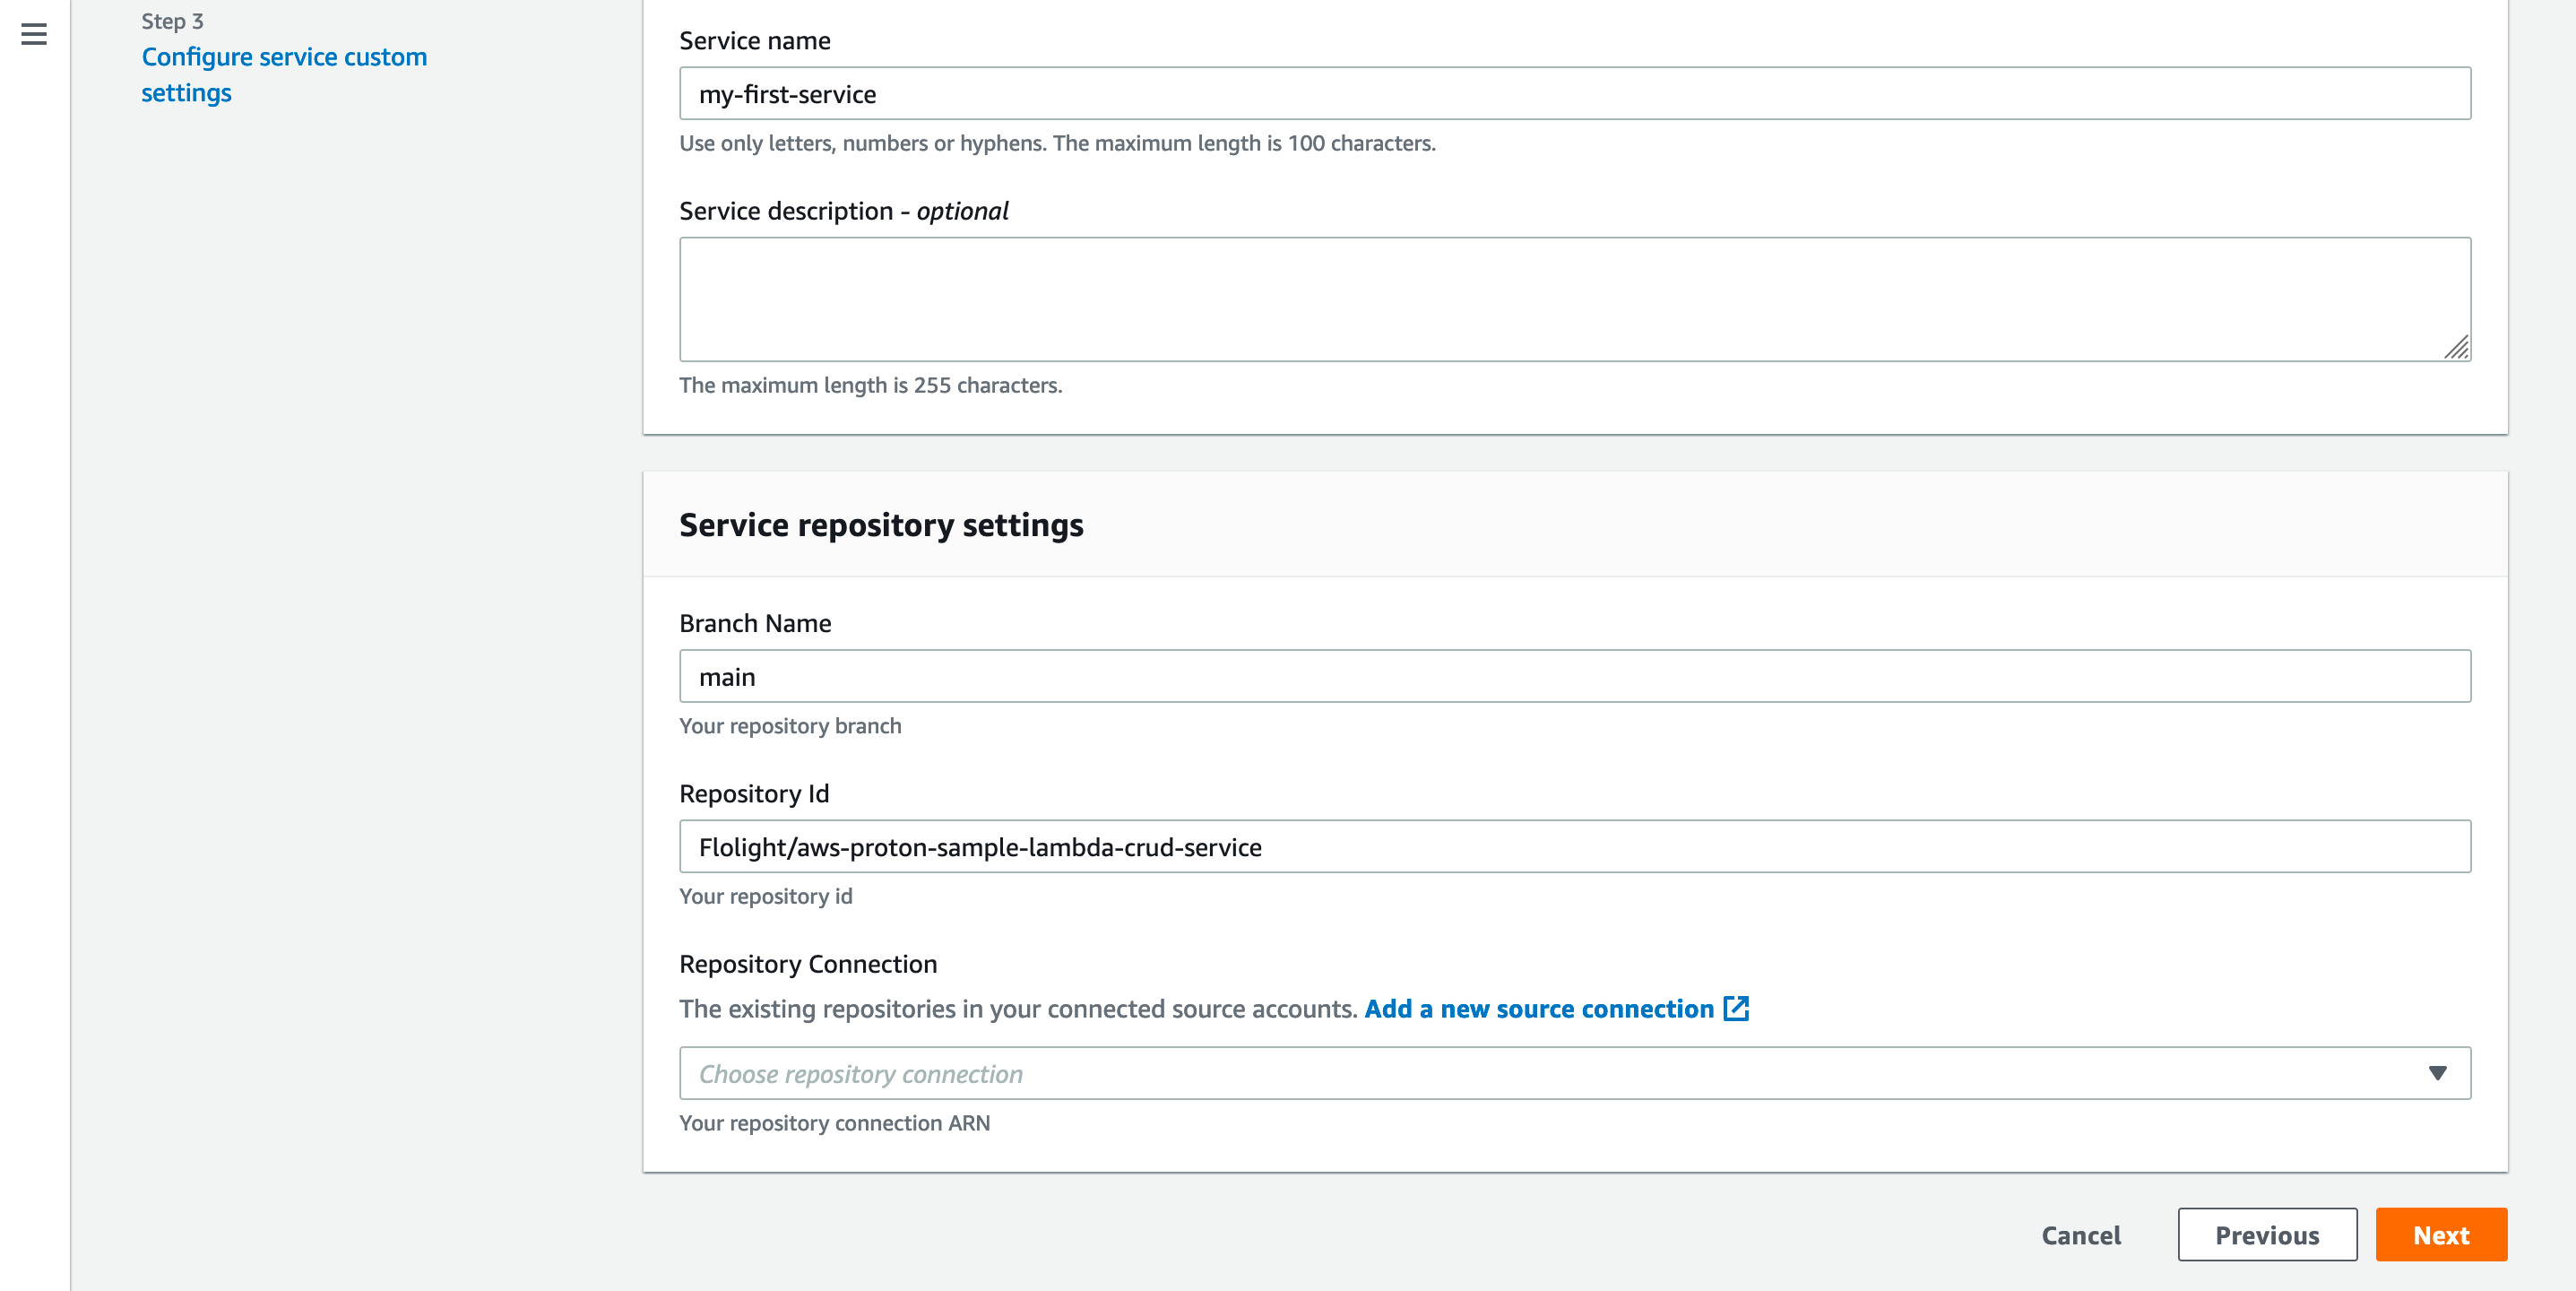
 * And fill the information with the branch name and the GitHub repository
_You can find some code sample in_ [_this repository_](https://github.com/aws-samples/aws-proton-sample-templates)_._
* And fill the information with the branch name and the GitHub repository
_You can find some code sample in_ [_this repository_](https://github.com/aws-samples/aws-proton-sample-templates)_._
 When the deployment is completed, we are able to reach our service using the provided url.
We can use this newly created Proton structure for our future deployments.
## Conclusion
We were able in a few minutes to set up an entire Proton process. And we have just touched how powerful it can be on a scaling and governance perspective.
Here are some AWS Proton major benefits:
* Developers can deploy safely their applications without having to manage the deployment infrastructure and CI/CD
* It works with containers and serverless stacks
* Proton provides **consistent architecture across projects**
* Easy **infrastructure-as-code** organization by design
* **No additional charges**, you pay only the resources created by your templates
This article was just an introduction on the topic. I encourage you to experiment the tool and create your own templates to match your business use cases.
For an enlightened point of view of AWS Proton, I recommand the excellent article of [Forrest Brazeal](https://medium.com/u/b8d1e8a0e0d8?source=post_page-----1130c438450f--------------------------------) for [A Cloud Guru](https://medium.com/u/c73bfd51b440?source=post_page-----1130c438450f--------------------------------):
%[https://acloudguru.com/blog/engineering/aws-proton-is-conways-law-as-a-service]
**AWS is providing us with a new kind of tool that can help organizations on their daily struggle about quick response applications, innovation and process optimization. AWS Proton is still in its baby phase and will certainly be improved but this intriguing tool is already able to change the way we think about environment and pipeline management.**
_Feel free to reach me on_ [_Twitter (@FlolightC)_](https://twitter.com/FlolightC) _to tell me about your Proton use case or to ask me questions ! I’m always happy to discuss with you !_
When the deployment is completed, we are able to reach our service using the provided url.
We can use this newly created Proton structure for our future deployments.
## Conclusion
We were able in a few minutes to set up an entire Proton process. And we have just touched how powerful it can be on a scaling and governance perspective.
Here are some AWS Proton major benefits:
* Developers can deploy safely their applications without having to manage the deployment infrastructure and CI/CD
* It works with containers and serverless stacks
* Proton provides **consistent architecture across projects**
* Easy **infrastructure-as-code** organization by design
* **No additional charges**, you pay only the resources created by your templates
This article was just an introduction on the topic. I encourage you to experiment the tool and create your own templates to match your business use cases.
For an enlightened point of view of AWS Proton, I recommand the excellent article of [Forrest Brazeal](https://medium.com/u/b8d1e8a0e0d8?source=post_page-----1130c438450f--------------------------------) for [A Cloud Guru](https://medium.com/u/c73bfd51b440?source=post_page-----1130c438450f--------------------------------):
%[https://acloudguru.com/blog/engineering/aws-proton-is-conways-law-as-a-service]
**AWS is providing us with a new kind of tool that can help organizations on their daily struggle about quick response applications, innovation and process optimization. AWS Proton is still in its baby phase and will certainly be improved but this intriguing tool is already able to change the way we think about environment and pipeline management.**
_Feel free to reach me on_ [_Twitter (@FlolightC)_](https://twitter.com/FlolightC) _to tell me about your Proton use case or to ask me questions ! I’m always happy to discuss with you !_